
Standing Seam Seaming Tools: Machine Setup That Prevents Panel Damage
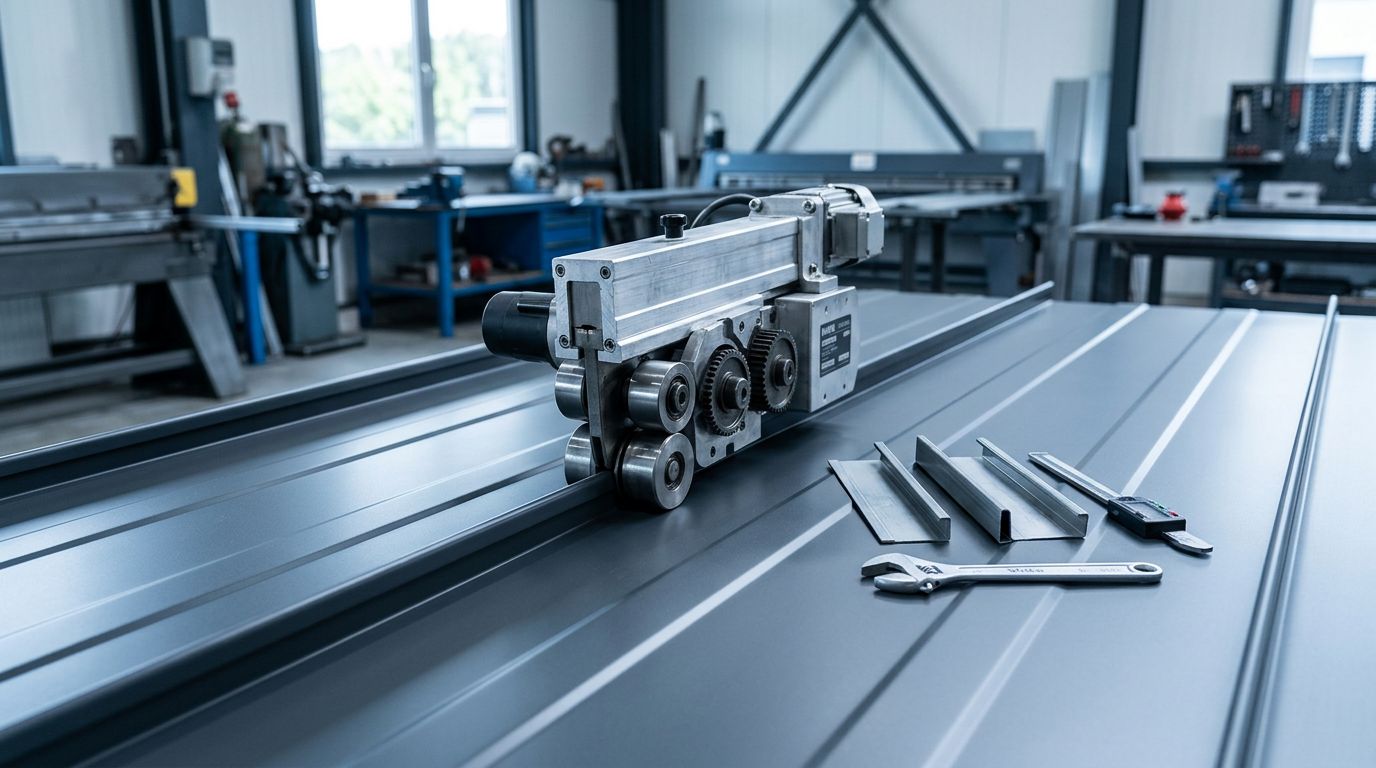
A portable seamer can close hundreds of feet of roof panels correctly, or crease a finished panel in one short pass. The difference often comes down to profile compatibility, machine adjustment, and the test seam completed before production begins.
The right standing seam seaming tools fit the exact panel profile, metal type, and lock design. A machine that looks close enough can still leave an incomplete seam, scar the finish, or distort the ribs.
Get the panel details, machine instructions, and safety plan in order before the seamer reaches the roof.
How standing seam seaming tools match the panel
Standing seam panels can look similar from the ground while using very different seam geometry. Mechanical-lock panels may need one or two forming passes. Snap-lock systems often join without a powered seamer. T-seams, bulb seams, and vertical-leg profiles also need their own approved equipment.
Even panels with the same nominal width can have different seam heights, fold directions, and metal gauges. Those details control how rollers close the seam and how much pressure the panel can accept.
Start with the exact seam profile
Record the panel manufacturer, profile name, seam height, metal type, gauge, panel width, and required lock sequence. Also confirm the clip type and fastening pattern before setting the machine on a panel.
A single-lock seam and a double-lock seam don't use the same process. Likewise, don't run a powered seamer on a snap-lock profile unless the panel manufacturer calls for that step.
A seamer must match the full seam shape, not only the visible seam height.
Trim, closures, and flashing need the same level of accuracy. A custom metal roof trim ordering guide can help confirm the profile details before fabrication or installation begins.
Choose manual or powered equipment for the task
Smooth-jaw hand seamers work well for short sections, eave hems, transitions, repairs, and areas a portable machine can't reach. They give the installer control, although repeated hand work can create uneven closure if each pass doesn't match.
Powered seamers suit long mechanical-lock runs and larger roofs. They reduce labor and create a consistent profile when the setup is correct. However, they need a careful test run, clean rollers, a stable power source, and steady operation.
Keep both tool types available when the panel system calls for machine seaming. Most roofs still have details near eaves, ridges, hips, valleys, or penetrations that need hand work.
Complete pre-installation checks before seaming
A seaming machine can't fix a poorly installed panel. First, inspect the roof deck or approved substrate, underlayment, eave details, clips, panel alignment, and fasteners. Follow the panel manufacturer's installation instructions at every stage.
Look down each installed seam before closing it. Kinks, bowed panels, crushed edges, misplaced clips, and panel tension can all show up more clearly after seaming.
Inspect the panels and seam path
Check that panel edges engage evenly before starting. The seam should lie straight without forcing one panel toward the next. Remove metal shavings, packaging debris, sealant residue, and loose fasteners from the seam path.
Next, confirm that clips sit in the approved position and don't bind the panel. A clip that sits out of line can cause a ripple or tight spot when the seamer passes over it.
Protect the painted finish during handling. Don't drag panels, tools, cords, or machine cases across installed roofing. Small scratches can become corrosion points in Florida's humid, salt-exposed environments.
Plan for roof safety and weather
OSHA's standing seam roofing guidance calls for fall protection when workers are 6 feet or more above a lower level. Use the job's required personal fall-arrest system, guardrails, ladders, covers, or other approved protection.
Secure cords, batteries, test panels, and loose tools. Skylights and roof openings need approved covers, guardrails, or fall-arrest protection. Covers must be secured and marked.
Hot metal, sudden rain, lightning, and gusty conditions can make machine work unsafe. Stop when footing, visibility, or control deteriorates. A rushed pass with a seamer can damage a full panel in seconds.
Set up the seaming machine on a test section
Standing seam seaming tools should be adjusted on matching panel material before production starts. Use a panel offcut or short assembled test section with the same profile, gauge, finish, and lock configuration as the roof.
Don't guess at roller pressure or guide position. Use the equipment manufacturer's settings for that panel system, then confirm the result with a physical test seam.
Follow this setup order
- Place the machine on a clean, stable work surface and inspect its housing, guards, handles, drive components, and fasteners.
- Clean rollers, dies, and guides with a soft cloth. Metal chips or hardened sealant can scratch paint and alter the machine's grip.
- Confirm the machine has the approved roller set or die set for the panel's seam type, metal thickness, and lock sequence.
- Check the cord, battery, connectors, and drive direction. Use only the power source and extension-cord arrangement approved by the machine manufacturer.
- Set the guides so the machine tracks the seam centerline without pinching the panels before the rollers begin forming the lock.
- Run a short test seam at the machine's recommended pace. Keep the panel section supported so it doesn't twist or pull against the guides.
- Inspect the finished sample, then adjust only as the manufacturer allows. Record the final setup before moving to full-length panels.
The seamer comes after correct eave flashing, panel layout, and clip installation. Review the step-by-step standing seam roof installation sequence before closing the first field seam.
Read the test seam before production
A good test seam has a uniform lock along its full length. The panel faces stay flat, the coating remains free of scuffs, and the seam shape matches the approved detail.
Check both ends of the test section. A setup can look acceptable in the middle while leaving a loose start or finish. If the sample has gaps, uneven compression, paint marks, or a crushed rib, stop and correct the machine before continuing.
Run the seamer with steady control
Correct operation is controlled rather than forceful. The machine should travel on the seam at a consistent pace, with the operator guiding it lightly and watching the panel path.
Follow the approved travel direction for the machine and panel profile. Some systems have a required starting end, so don't reverse a powered seamer unless its manufacturer permits it.
Keep the machine centered on the seam
Place the machine squarely on the engaged seam. Let its guides settle into position before starting the drive. Then keep the tool aligned without pulling it sideways or pushing ahead of its traction.
Watch the seam immediately behind the machine. If the panel begins to buckle, the seamer wanders off-center, or the finish starts marking, stop at once. Continuing can turn a small setup issue into a replacement panel.
One crew member should manage the cord or cable when needed. That prevents snagging and keeps the operator focused on the seam. Avoid stepping on panel ribs or placing body weight against the seam while the tool passes.
Use hand seamers carefully at roof details
Hand seamers work best in short, deliberate passes. Use smooth, undamaged jaws that fit the detail. Close the seam in the sequence shown by the panel manufacturer instead of squeezing the whole height in one aggressive motion.
Eave connections often need close attention because the panel hem, cleat, and first seam all interact. Follow the approved standing seam eave cleat installation detail so the panel stays secure without blocking drainage.
Don't use locking pliers, sharp-edged clamps, or improvised tools on exposed painted surfaces. They can dent the metal or damage the coating where water collects.
Inspect every finished seam and accessory
Quality control should continue throughout the roof, not only at the end of the day. Inspect the first completed seam, then check subsequent panels at regular intervals and after any machine adjustment.
Pay added attention near eaves, ridges, valleys, roof-to-wall details, and penetrations. Those locations often include changes in panel stress, closures, trim, or hand-seamed sections.
Look for full and even closure
The finished seam should match the approved panel profile along its entire length. Look for open edges, skipped locks, bulges, split metal, crushed areas, paint scuffs, and clips that telegraph through the panel.
Run a visual check down the seam line from more than one angle. Light reflecting across the roof can reveal a wavering seam or oil-canning that isn't obvious from directly above.
Ridge work also deserves a separate inspection. Use the correct closures, sealant locations, and cap attachment method shown in the standing seam ridge-cap installation detail.
Don't confuse seaming settings with clamp torque
Seaming machines close panel joints. They don't set the torque for roof-mounted accessories, snow retention, or clamps. Follow the attachment manufacturer's instructions for every accessory.
For certain S-5-T and S-5-Z clamp installations, S-5! lists 160 to 180 inch-pounds for 22-gauge steel and 130 to 150 inch-pounds for other metals and thinner steel. Those values apply to those listed clamp applications, not to seamer roller pressure.
S-5! also calls for calibrated torque verification and notes that seam material can compress after initial tightening. Recheck attachment tension when the system instructions require it, especially on load-sensitive accessories.
Correct seam defects and maintain the equipment
Stop when a seam doesn't form correctly. Reworking a defective joint without finding the cause can crease the panel, split the lock, or leave a seam that won't meet the manufacturer's requirements.
A few minutes spent diagnosing the issue protects the roof and avoids repeated damage across the next several panels.
Track the source of common problems
An incomplete seam can point to a wrong profile match, incorrect roller setup, debris, poor feed alignment, or excessive travel speed. First, compare the panel and machine setup to the approved instructions.
Scuffing usually calls for a roller and guide inspection. Clean the machine, remove embedded metal chips, and look for worn or damaged contact surfaces.
A crushed seam often indicates too much pressure, the wrong roller set, or a mismatch between the machine and panel gauge. Meanwhile, waviness may come from panel tension, crooked clips, or a seam that wasn't properly engaged before closing.
Clean and store tools after each job
Remove metal shavings, dust, sealant, and moisture from every roller, guide, and drive surface. Inspect moving parts, fasteners, handles, cables, and guards before the next use.
Lubricate only where the equipment manufacturer directs. Excess lubricant near rollers can transfer to painted panels and attract debris.
Store powered equipment in a dry, protected location. Check hand seamer hinges and jaws for looseness or wear. Keep torque tools calibrated according to their manufacturer instructions so accessory fasteners aren't tightened by feel.
A Well-Set Machine Protects the Roof
A clean, profile-matched machine and a successful test seam protect both the panel finish and the roof's weather resistance. Standing seam seaming tools work best when installers follow the panel and equipment instructions without improvising roller settings or seam sequence.
Every full-length seam should begin with aligned panels, correct clips, safe footing, and a machine that has already proven its setup on matching material.
Share Our Metal Roofing News Articles
Related Posts




