Standing Seam Ridge Cap Installation With Z-Closures
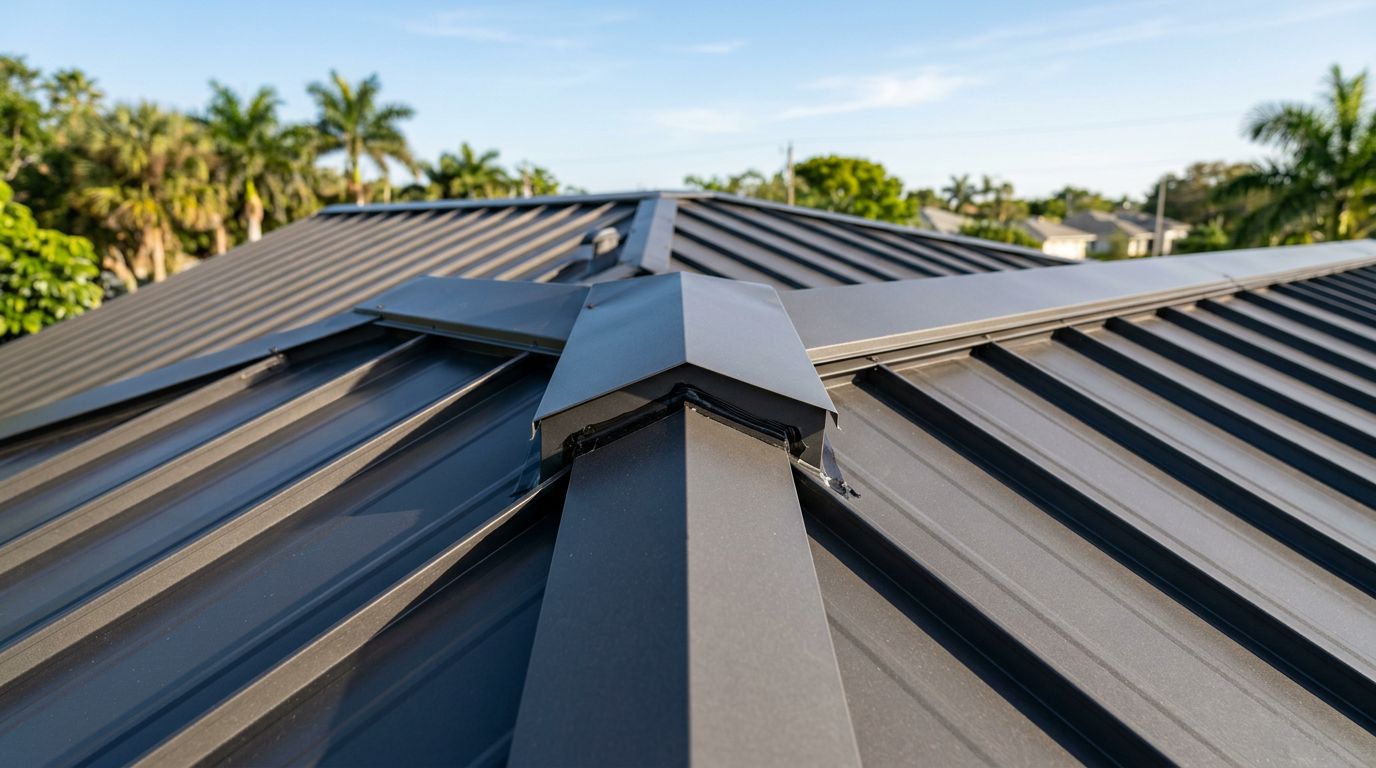
Rain rarely enters a metal roof at the center of a panel. It finds small openings at transitions, laps, and the ridge. At the roof peak, a standing seam ridge cap must shed wind-driven rain while allowing the panels to expand and contract.
A clean cap line isn't enough. The Z-closures beneath it need to match the panel ribs, sit flat, and seal according to the roof system's detail. This guide covers the installation sequence, material checks, safety points, and inspection steps for Florida projects. Start with exact manufacturer instructions and local code requirements.
How a standing seam ridge cap works with Z-closures
Standing seam panels run up each roof slope and stop near the peak. The ridge cap bridges the two panel fields, while cleats, clips, or other concealed attachments hold the cap in place. The goal is a weather-resistant joint that doesn't lock the panels against normal thermal movement.
A Z-closure is a formed component placed at the upper end of a panel, usually beneath the ridge cap. Its shape follows the panel geometry and creates a consistent surface for the cap assembly. Depending on the system, it may close rib openings, support a vent, or connect with a cleat. The exact orientation matters because one edge may be designed to shed water.
Standing seam families differ. Snap-lock and mechanically seamed panels don't use the same cap detail, and a vented ridge has different parts from a solid ridge. Review metal roof ridge cap styles before ordering, then match the cap, closure, clips, and sealant to one panel system.
Some roofs use formed metal Z-closures. Others call for profile-matched foam, universal closure material, or a different trim detail. The closure must fit the specific ribs, not merely look close. A guide to matching panel profile closures can help when comparing closure options.
A ridge cap can look tight from the ground and still leak if the closure leaves a small gap at one rib.
Confirm the roof system before cutting metal
Start by recording the panel manufacturer, product family, seam type, panel width, rib dimensions, roof slope, and substrate. Confirm whether the ridge is vented or unvented. Also identify the specified cap profile, closure material, cleat or clip arrangement, fastener type, lap direction, and sealant.
Don't combine a cap from one standing seam family with closures from another. Small differences in rib height or seam width can prevent full contact. They can also shift the cap enough to affect the intended attachment points.
Florida roofs need extra attention to wind and rain exposure. Check the manufacturer's tested or approved assembly, required fastening schedule, and any Florida Product Approval or Miami-Dade approval that applies to the project. Local building officials may require documents for the roof covering, attachment method, and wind zone.
On an existing roof, inspect the panel ends, clips, purlins or decking, underlayment, and ridge alignment before installing trim. Replace damaged panels or loose framing first. A ridge cap can't correct movement or weak support below it.
Tools and materials for the job
Gather the system-matched ridge cap, Z-closures, cleats or clips, specified fasteners, butyl tape or sealant, measuring tools, chalk, a hand seamer, and a drill with a clutch. Keep a soft broom or magnet available for metal filings. Avoid abrasive saws when the manufacturer prohibits them, because hot filings can damage the coating and create rust spots.
Use gloves, eye protection, stable roof access, and the fall protection required by OSHA and local rules. Don't install on wet panels, during lightning, or in wind that makes sheets or trim difficult to control. Keep workers below clear while long cap pieces move to the roof.
standing seam ridge cap installation: a careful sequence
The sequence below fits many concealed-fastener assemblies, but it isn't a substitute for the installation manual. Follow the supplied detail when it differs.
- Mark the ridge and dry-fit the cap. Confirm that both roof slopes meet at the intended ridge line. Lay out cap sections without sealant and check the planned overhang, end conditions, and lap locations. Measure from several points because a ridge can vary along the roof.
- Prepare the panel ends. Trim or hem the upper panel ends only as the manufacturer's detail shows. Keep the seams straight and free of sharp burrs. Remove dirt and loose coating, but don't cut through a rib or flatten a seam to make an incompatible closure fit.
- Install the approved ridge vent, if required. A vented assembly may use a formed vent, a continuous vent strip, or another specified component below the cap. Keep the air path open and maintain the clearances shown in the detail. If the roof is designed as an unvented ridge, don't add a vent product that changes the assembly.
- Position the Z-closures. Place the closure at the upper end of each panel slope, aligning every opening with the matching rib. Apply butyl tape or sealant only where the detail calls for it. Follow the closure's marked orientation, and keep its edges in full contact with the panel surface.
- Attach the closures or cleats. Use the specified fasteners and attachment points. The required fastener type, spacing, and substrate vary by panel system, wind design, and approval. Drive screws straight and snug, not so hard that they distort the closure or crush a washer. Avoid placing fasteners where they block designed panel movement.
- Set the ridge cap. Center the cap over the ridge and confirm that its legs cover the closures evenly. Engage the cap with the cleats, clips, or hemmed connection shown by the manufacturer. Don't force a cap into place by bending the standing seams, and don't screw through the cap top unless the approved detail requires it.
- Complete cap laps and ends. Join each section in the required direction so water flows over, rather than into, the lap. Use the specified overlap and sealant placement. Finish gable-end conditions with the correct end closure, hem, or trim. Avoid a field-made patch that leaves an open channel behind the cap.
- Make the final attachment and cleanup. Check every connection, remove metal shavings, and wipe away excess sealant before it cures. Look for lifted edges, open seams, distorted closures, and cap sections that rock when pressed lightly. Correct these issues before the roof is exposed to heavy rain.
Sealant, ventilation, and thermal movement details
Sealant supports a correctly fitted assembly, but it can't make a mismatched closure watertight. Butyl tape, tube sealant, or both may be specified at different locations, including beneath closure flanges, at cap laps, and around end details. Use the product named in the roofing instructions, and respect its temperature and cure requirements.
Keep sealant out of any designed drainage path. Don't fill every visible opening with caulk without checking the detail. Excess material can interfere with a cleat, stop a vent, or trap water against coated steel.
Standing seam panels expand and contract along their length as temperatures change. Some systems use a fixed cleat in one location and sliding cleats elsewhere. Others use a different connection. Install the approved arrangement rather than locking the cap to every panel section. Coastal Florida projects also require compatible materials, fasteners, and sealants that suit the specified coating and exposure.
Inspect the ridge before calling it complete
Inspect the ridge from both slopes and from the ends. The cap should follow a straight line, cover the closures evenly, and remain fully engaged with its attachment method. Each closure should contact the panel profile without crushed corners or visible gaps.
Use this short inspection list:
- Look for daylight beneath the cap or between a closure and a rib.
- Check that laps face the specified direction and contain the required sealant.
- Verify that fasteners sit correctly and haven't distorted the trim.
- Remove every metal shaving, clipped corner, and loose piece of tape from the roof.
If a gap appears, stop and find its cause. The problem may be a wrong closure, an uneven panel cut, a cap that is out of square, or an attachment point in the wrong location. Adding surface caulk over the gap may hide the symptom while leaving the joint vulnerable to wind-driven rain.
After the assembly passes a visual check, follow the manufacturer's guidance for any water testing. Never use a pressure washer to test a ridge. If a leak appears later, inspect uphill laps and closure contact before assuming the panel field is at fault.
Conclusion
A dependable standing seam ridge cap installation starts with a matched system, not a generic trim piece. Correctly fitted Z-closures close the panel ribs, support the ridge detail, and work with the cap's attachment method without restricting thermal movement.
Measure the ridge, follow the approved sequence, use the specified sealant and fasteners, and inspect every closure before the next Florida storm. The small components beneath the cap control how well the roof handles wind-driven rain, so they deserve the same care as the panels themselves.
Share Our Metal Roofing News Articles
Related Posts