Z-Closure Flashing Guide for Standing Seam Roof-to-Wall Transitions
A standing seam roof sheds water well, until it hits a wall. That roof-to-wall joint is where wind-driven rain, thermal movement, and small install shortcuts tend to show up later as stains, rust, and leaks.
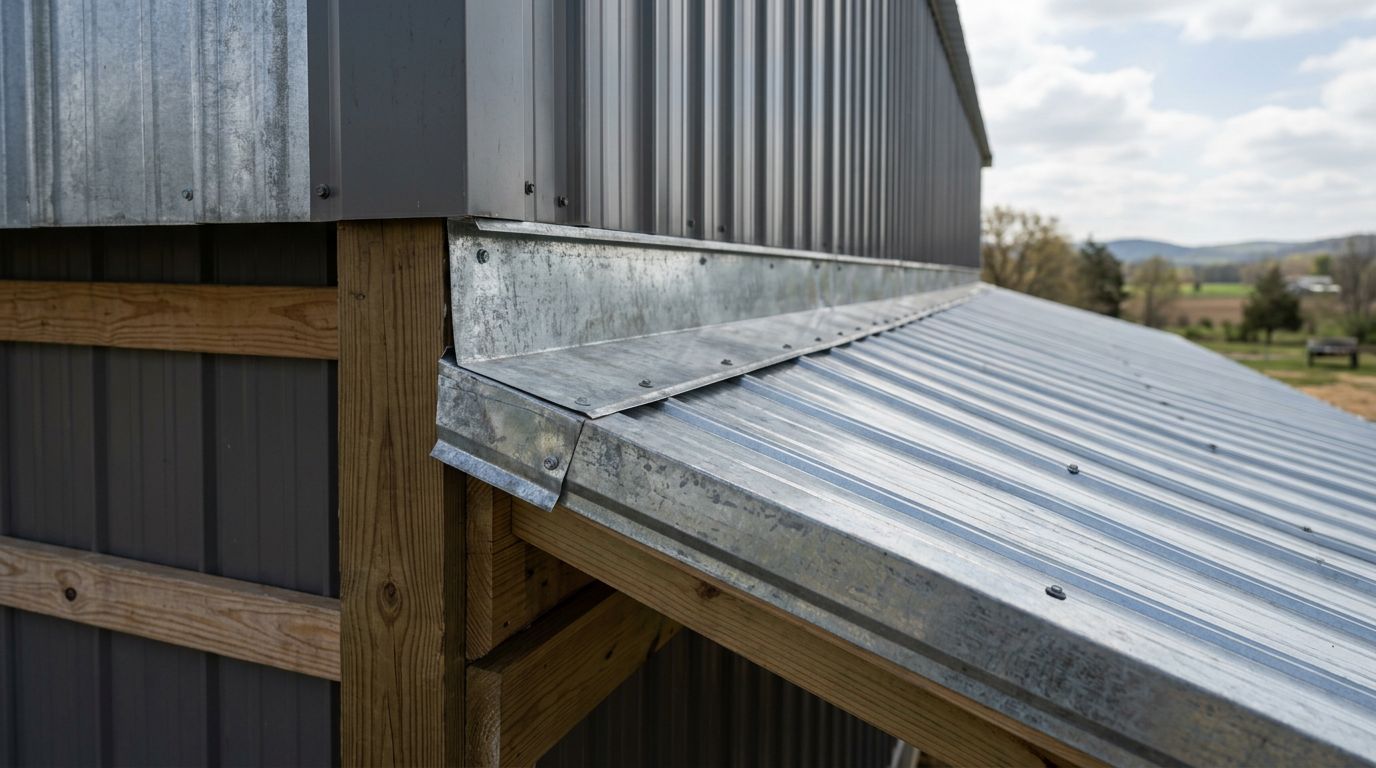
Z-closure flashing is one of the simplest parts in that transition, but it does a big job. It creates a solid, shaped "landing" so wall trim can lock in, seal, and stay put. Get it right and the detail acts like a gutter for the last few inches of the roof. Get it wrong and it becomes a funnel into the assembly.
Details vary by panel profile and manufacturer, so always confirm the exact lap, sealant, clip, and fastener pattern in the panel system's installation manual, then match local code and inspection rules.
What a Z-closure does at a roof-to-wall transition (and the terms that matter)
Start with the vocabulary, because roof-to-wall transitions get confused fast.
Standing seam is a metal roof system with raised interlocking seams and hidden attachment (clips or concealed fasteners). It's great for Florida rain because there aren't rows of exposed screws across the field.
A headwall (often called an endwall) is where the roof plane runs into a wall at the top end of the panels. A sidewall is where the wall runs parallel to the roof slope.
Counterflashing is the upper piece that covers the top edge of base flashing and ties into the wall surface or wall water control layer. In stucco or masonry, that often means a reglet (a cut groove) or an approved termination method.
WRB (water-resistive barrier) is the drainage layer behind cladding (building paper, housewrap, or a peel-and-stick membrane). Your flashing should drain on top of the WRB, not behind it.
So where does a Z-closure fit? Think of it as a small "shelf" installed on top of the panel ribs at the termination. It gives the wall flashing something to hook to or fasten to, and it creates a consistent compression zone for butyl tape or sealant.
A clean roof-to-wall detail relies on laps and shape first. Sealant supports the detail, it doesn't replace it.
One more reality check for Florida: metal moves. Long, sun-heated panels expand, then shrink in afternoon storms. If a Z-closure turns the end of the roof into a hard stop when the system expects float, stress shows up as oil-canning, popped seams, or split sealant. If you need a refresher on movement planning, see thermal expansion at roof walls.
Pre-install checks: profile match, water control layers, and corrosion in Florida
Before you set the first piece of Z-closure flashing, confirm three things: geometry, drainage plane, and material compatibility.
Geometry and profile match: Z-closures are not one-size-fits-all. The height has to match the panel rib height and the wall flashing hem or receiver detail. Also confirm where the panel ends relative to the wall. Many systems need a specific setback to fit closures, z-bars, and trim without pinching the seam.
Water control layers at the wall: The wall should have a WRB and a clear plan for how water exits. On new construction, coordinate with the builder so the WRB laps over the top edge of the roof-to-wall flashing (shingle-style). On retrofits, you may be working under existing siding, stucco terminations, or a soffit return, so plan how you'll install counterflashing or a termination bar without trapping water.
If you want a quick terminology baseline to keep crews aligned, share roof-to-wall flashing types before layout day.
Corrosion and fastener choices (Florida and coastal zones): Salt air and wet debris accelerate corrosion. Match metals to avoid galvanic action, and don't mix "whatever is on the truck" with a coastal job. In addition, use a sealant that's compatible with painted metal, and avoid smearing it where it will catch dirt and stay wet. Stainless fasteners are common near the coast, but confirm what your panel system allows.
Climate callouts:
- Wind-driven rain: Assume water can run uphill during gusts. That's why continuous butyl tape, correct laps, and tight hems matter.
- Snow and ice (for out-of-state installs): Backwater can sit at headwalls. Use higher-temperature rated underlayment and confirm minimum upturn heights.
Step-by-step: installing Z-closure flashing at a standing seam roof-to-wall
The sequence below fits most standing seam roof-to-wall conditions, but adjust to the panel manufacturer's detail.
1) Work safely and keep the roof surface clean
Use fall protection, stable ladders, and roof anchors as required. Wear cut-resistant gloves, long sleeves, and eye protection. Fresh-cut metal edges are razor sharp, and metal shavings can rust onto finished panels if you leave them behind. Sweep the roof often, especially before sealing.
2) Confirm the panel termination and allow for movement
Dry-fit the wall flashing location first, then confirm where the panel ends. Don't "trap" the panel unless the system calls for a fixed point at that transition. If the manufacturer expects the roof to float, your Z-closure and wall trim have to respect that.
For broader standing seam sequencing context, reference standing seam panel transitions, then apply the specific roof-to-wall detail for your profile.
3) Place butyl tape (or approved sealant) in the right path
Run continuous butyl/mastic tape where the Z-closure will compress it. Keep the tape unbroken across the pan areas, and plan how it crosses raised seams. On many systems, you'll bridge the seam area with a compatible sealant bead or a formed closure approach so you don't create a leak channel.
Avoid stretching tape. Instead, press it in place so it keeps thickness and fills minor waviness.
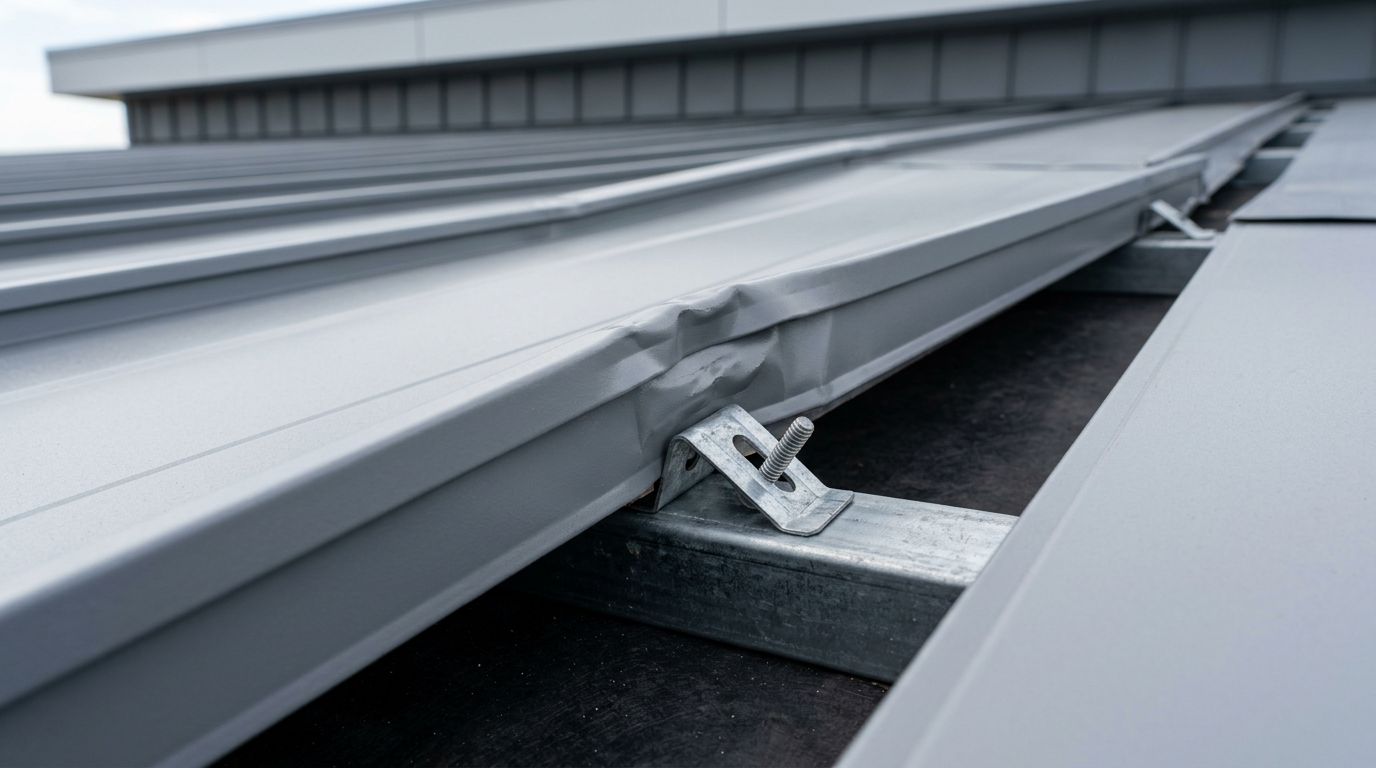
4) Set the Z-closure and fasten it correctly
Set Z-closure flashing square to the panel ribs. Fasten per the panel system requirements, using the specified screw type (often pancake head for low-profile attachment). Hit structure where required, and don't overdrive screws. Overdriving can dish the metal and open a capillary path.
Keep joints tight. When you splice Z pieces, lap them shingle-style and seal the lap if the detail calls for it.
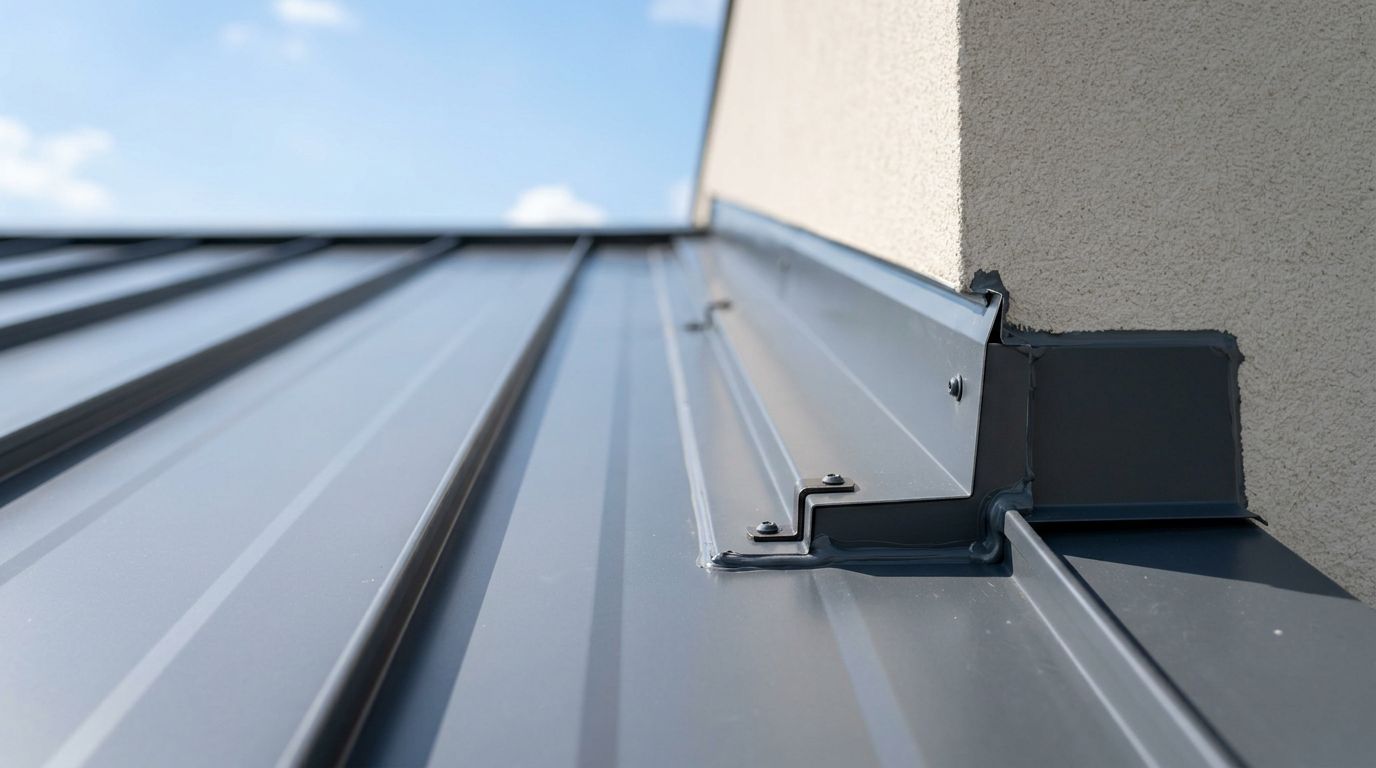
5) Install the wall flashing, then counterflashing or termination
Install the headwall or sidewall flashing so it covers the Z-closure and directs water back onto the roof. Then secure the upper edge with counterflashing or a code-accepted termination method. The goal is simple: any water that gets behind the counterflashing still drains out on top of the roof flashing, and not into the wall.
Where installers get burned is relying on a straight caulk bead at the wall line. Sun and movement will crack that joint. Use mechanical laps and terminations first.
If the wall line "needs caulk to work," it won't last long in Florida weather.
6) Do a field check before you leave
Water test the transition (when allowed), then visually confirm: continuous sealant lines where specified, no fishmouths in tape, no exposed fasteners in water paths, and no sharp inside corners left unsealed.
If you're troubleshooting an existing leak, compare what you see to common Florida failure patterns in roof-to-wall transition issues.
Conclusion
A roof-to-wall joint is like the cuff on a rain jacket. The fabric can be perfect, but the cuff still decides if water stays out. With Z-closure flashing , the win comes from correct profile fit, shingle-style laps, and a wall termination that drains and stays locked down. Follow the panel manufacturer's detail, match local code, and treat Florida wind and rain as the baseline, not the exception.
Share Our Metal Roofing News Articles
Related Posts