
Metal Siding End Lap Installation on Florida Pole Barn Walls
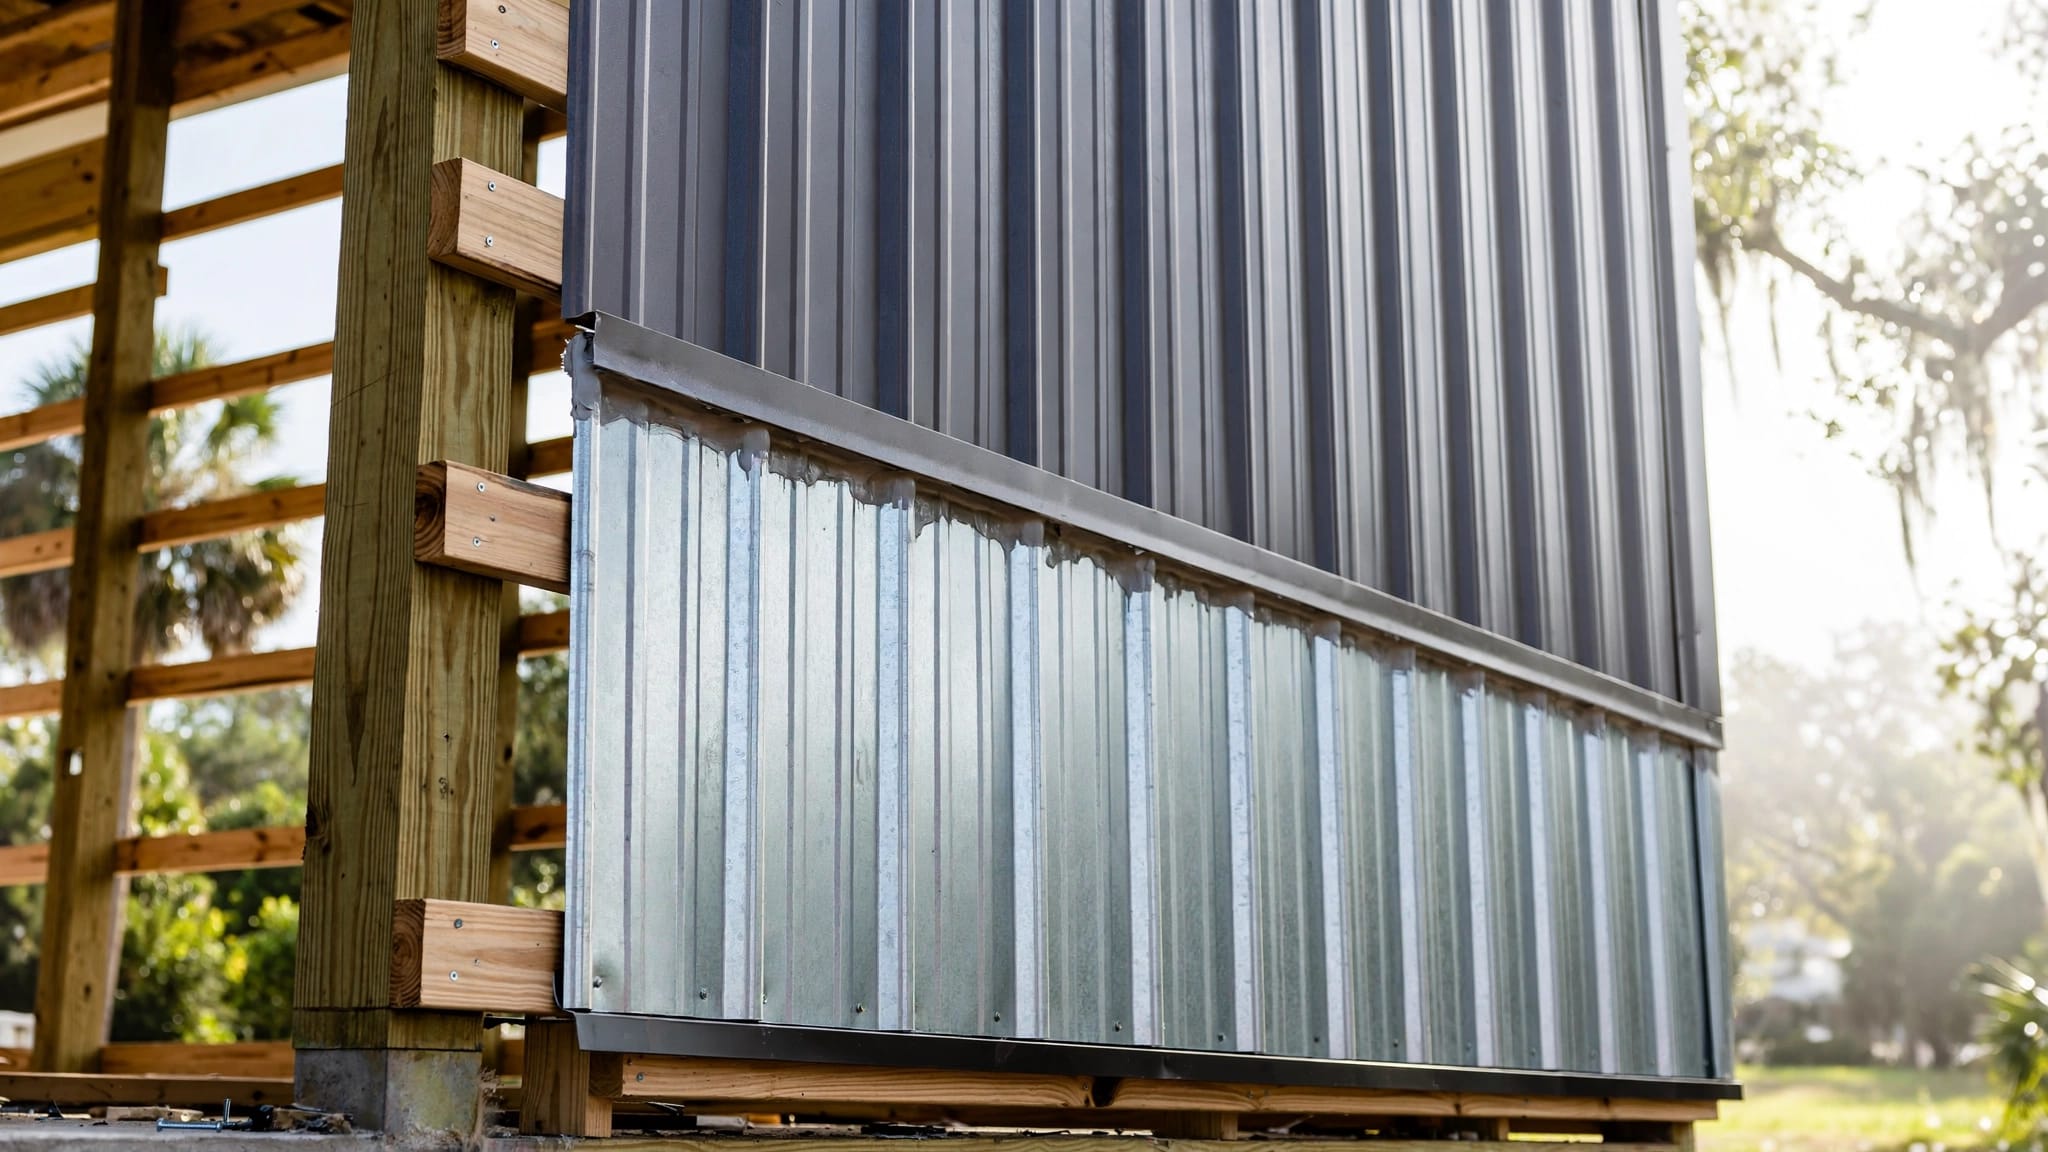
A long pole barn wall can turn one small alignment error into a crooked row of panels. The metal siding end lap is where that error often becomes visible, or worse, becomes a route for wind-driven rain.
Long panels are the cleanest option when they can be safely produced, delivered, and handled. However, when wall height, panel length, or job-site access requires a splice, careful layout and sealing keep the wall looking straight and shedding water. Start with the framing, then build each lap as part of the approved wall system.
Plan the Wall Before Cutting a Panel
An end lap joins two panels along their length. On a vertical wall, that joint needs solid backing and a layout that doesn't create a long, obvious horizontal line across the building.
Check girts, posts, and trim lines
Run a string line or laser across the wall before installing base trim. Girts should form a flat, consistent plane. A bowed girt, proud post, or twisted board can pull a panel out of line and leave a gap at the lap.
Correct framing issues before metal goes on. Sealant can close a small designated joint, but it can't support a loose panel or hide a major framing error. Misaligned supports can also cause oil canning, the visible waviness that sometimes appears in light-gauge metal flats.
Dry-fit base, corner, and transition trim first. If trim needs force to sit flat, find the framing problem before starting the panel run.
Lay out staggered joints
Avoid putting every end joint on the same girt line. Instead, offset panel end laps where the panel manufacturer's details and the building design allow it. A staggered layout reduces the chance of a continuous weak line across a long wall.
Measure full-panel runs from the base trim upward. Mark each support where a lap may occur, then verify that both panel ends will land with adequate bearing. Don't place a splice in midair or let it fall near a door head, window trim, or another busy transition.
Order enough material before the crew starts. This guide on estimating pole barn siding materials can help account for panels, trims, closures, and fasteners without relying on guesswork.
Metal Siding End Lap Installation Sequence
The correct metal siding end lap sequence follows the panel maker's drawing, product approval, and the building's permitted design. Panel profile, gauge, substrate, wind exposure, and wall orientation all affect the detail.
Dry-fit the lower panel and overlap
Install the lower panel first, keeping it plumb and aligned with the established base line. Its upper end should land where the approved detail calls for support.
Then set the upper panel over the lower panel at the required lap length. Don't assume one overlap dimension fits every profile. Published instructions range widely because some panels aren't intended for end laps, while other systems require a longer overlap in demanding conditions.
Before fastening, check three things:
- Both panel ends have firm support behind them.
- The ribs and flats line up without forcing either panel.
- The lap faces the direction that helps shed water rather than catch it.
A panel that starts out of plumb will pull every later panel off course. Check with a level every few sheets instead of waiting until the wall is finished.
Apply compatible tape sealant
Clean and dry the lap area before applying butyl tape or the manufacturer-approved sealant. Dirt, moisture, and metal shavings weaken the bond. Keep the tape continuous and place it exactly where the installation drawing shows.
Many metal-panel manuals require fasteners to pass through the sealant at an end lap. That compression blocks capillary water movement between the sheets. Once fastened, a small, even appearance of compressed sealant at the lap edge can indicate good contact. Excessive squeeze-out may mean the joint was over-tightened or the wrong tape size was used.
Wind can push rain sideways across a wall, and capillary action can draw water into a narrow unsealed lap even when the wall faces away from the weather.
Use compatible products throughout the assembly. Avoid roofing tar, unknown caulk, or dissimilar metals that can stain coatings or speed corrosion in wet conditions.
Fasten without crushing the panel
Drive fasteners straight and into the required substrate. On many exposed-fastener wall panels, screws go in the flat beside a major rib. Other systems call for a different location. Follow the approved detail instead of copying a pattern from another panel profile.
The sealing washer should seat firmly against the metal. A washer that spins freely hasn't sealed. A washer squeezed out beyond the screw head has been overdriven, and the resulting dimple can hold water.
For practical guidance on washer compression, stitch screws, and placement by wind zone, review this Florida metal siding fastener placement guide.
Florida Wind and Moisture Change the Details
Florida pole barns face humid air, heavy rain, and wind that can press water into trim edges and panel laps. Therefore, the lap is only one part of the wall assembly.
Follow the approved fastening schedule
A Florida product approval for a 26-gauge 7.2 wall panel over open framing calls for #12-14 self-drilling screws with sealing washers at 7.2-inch spacing, plus side-lap fasteners at 20 inches on center. That is an approved example for that panel and condition, not a universal screw pattern.
Your project may require different screw sizes, locations, spacing, or lap fastening. The panel's Florida Product Approval, engineering, manufacturer instructions, and local building department requirements control the work. Coastal exposure, building height, corner zones, and the High-Velocity Hurricane Zone can all change the schedule.
Keep water moving outward
Install water-resistive barriers and flashings in their intended sequence. Base trim, corner trim, jamb trim, closures, and sealant joints need to direct water back to the exterior.
Don't depend on a horizontal lap alone to stop every drop. A sound wall uses proper overlaps, supported panel ends, sealed joints, and trim that doesn't trap water. Match screw coatings and panel materials as well, because cheap or incompatible fasteners can become the first corrosion point.
Inspect Each Course Before Moving Up
After every row, step back and inspect the wall from an angle. Look for drifting ribs, lifted lap edges, dimpled screws, missing sealant, or uneven panel ends. Fixing one panel is quick. Correcting a full wall after trim is installed takes much longer.
Also inspect the inside of the wall after the first hard rain. Water may travel along a girt or panel rib before it becomes visible, so an interior stain doesn't always sit below the entry point. Record the panel profile, fastener type, sealant, and lap locations for future maintenance or repairs.
Keep loose metal shavings off painted panels. They can rust and leave marks that look like coating failure.
Final Thoughts
A durable long wall starts with straight framing and a planned panel layout. The metal siding end lap must land on support, use the approved overlap and sealant, and receive the correct fasteners without crushing the metal.
Treat every lap as part of a tested wall system, not as a quick splice. That approach helps a Florida pole barn stay tight, straight, and ready for years of hard weather.
Share Our Metal Roofing News Articles
Related Posts




