
Metal Roof Access Hatch Flashing for Florida Buildings
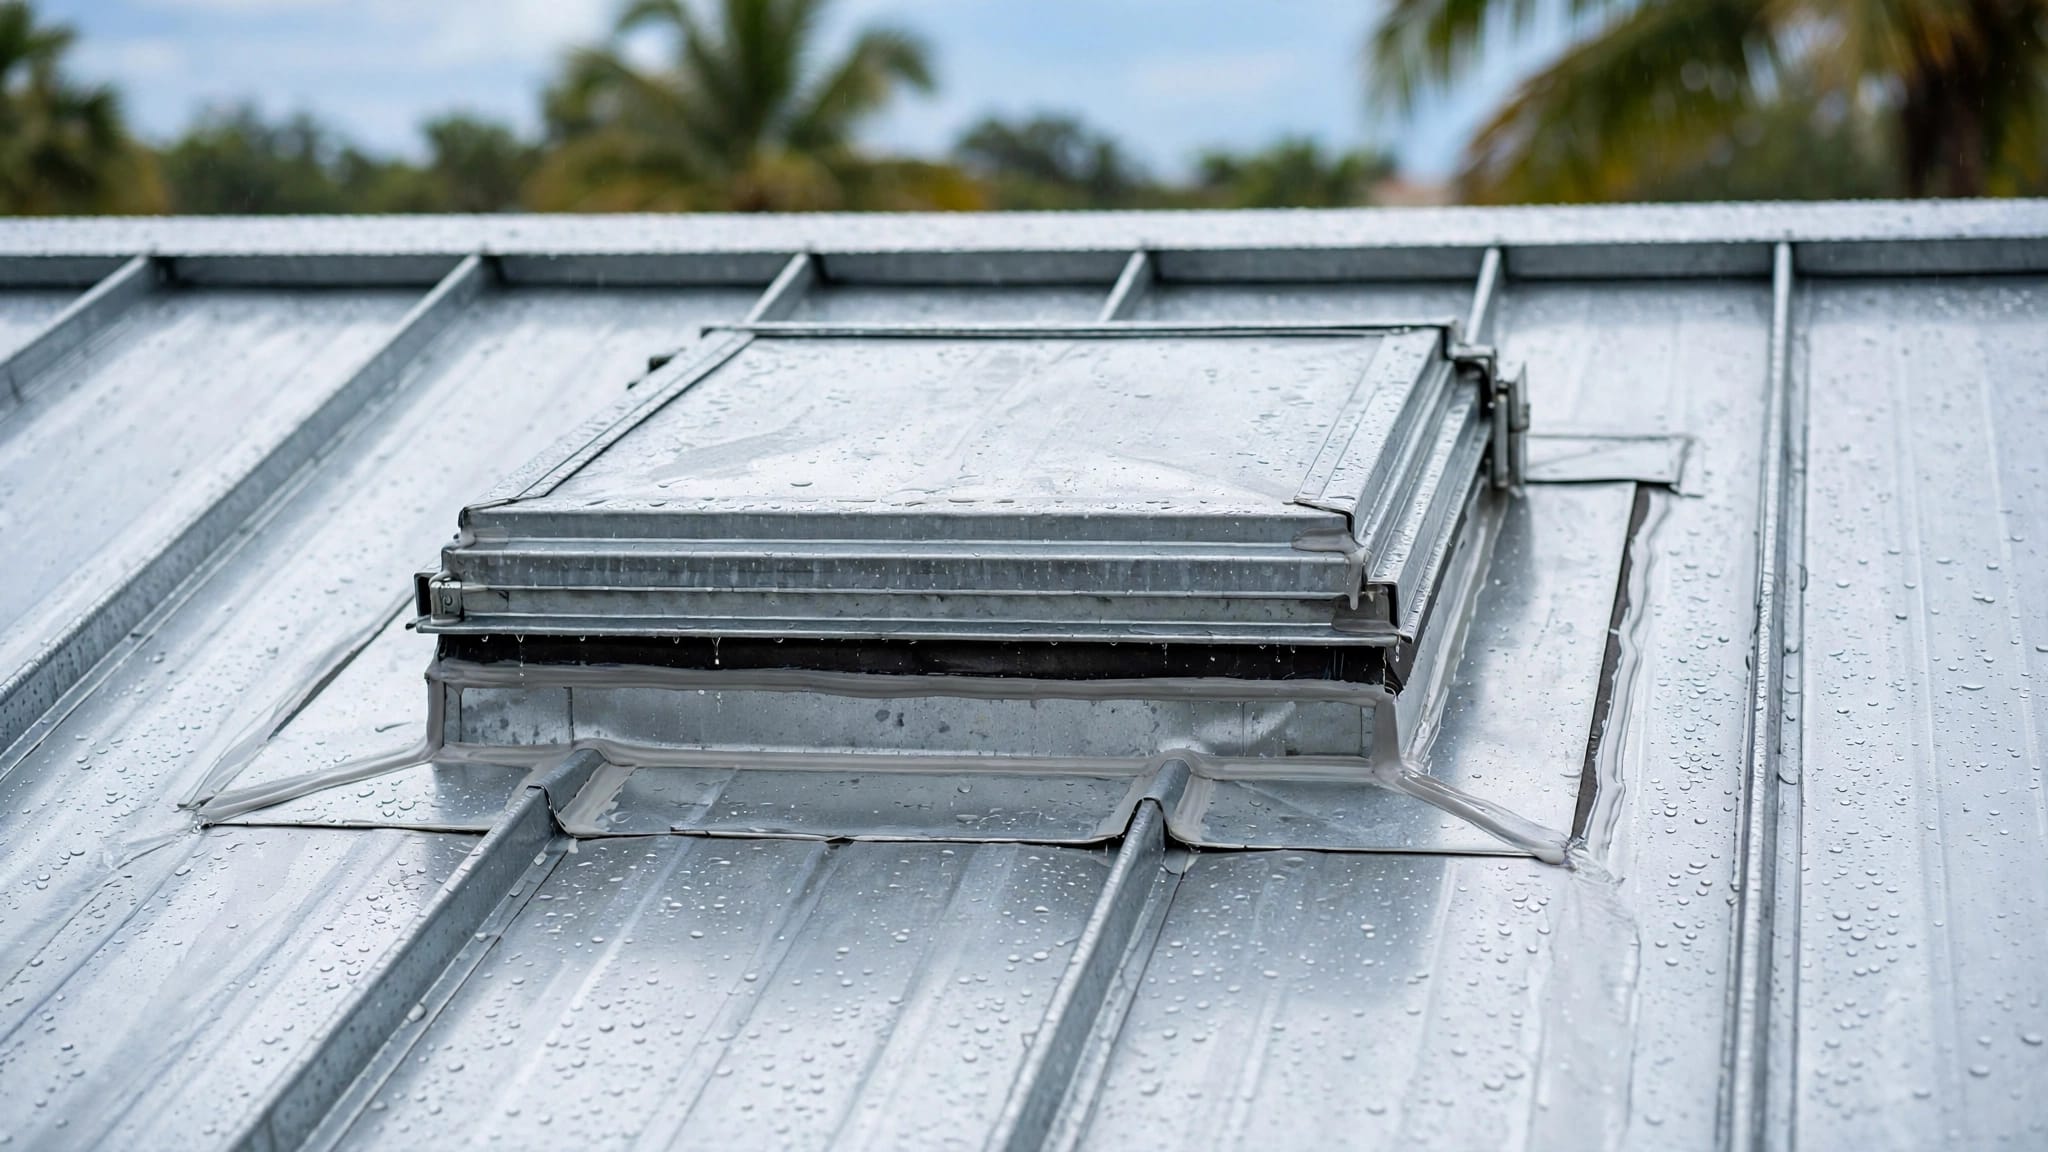
A roof access hatch cuts across the normal flow of panels, underlayment, flashing, and runoff. If that transition is poorly planned, wind-driven rain can enter at the curb long before a ceiling stain gives it away.
Reliable metal roof access hatch flashing starts with a curb detail that belongs to the roof system, not an afterthought added after panels are installed. On Florida commercial buildings, the assembly also has to handle intense rain, uplift pressure, salt exposure in many locations, and daily thermal movement.
The details below help contractors and property owners ask the right questions before fabrication and installation begin.
Why metal roof access hatch flashing needs a full system detail
An access hatch provides a safe route to rooftop equipment, but its curb interrupts every layer that keeps a metal roof dry. The hatch frame, supporting curb, metal panels, closures, sealants, and underlayment must work in sequence.
Water should move around the opening and return to the roof surface without crossing an exposed horizontal joint. Wind pressure must not lift trim, deform panel edges, or pull fasteners from their support. That requires more than a bead of sealant around the curb.
The curb carries loads, while flashing manages water
A hatch curb should transfer hatch and access loads to the building structure or approved framing. Roof panels are weathering components, not a substitute for a structural curb support.
The curb height, wall construction, insulation, and attachment method should follow the hatch manufacturer's requirements and the engineered project documents. A curb that flexes can break sealant bonds, loosen fasteners, and distort the flashing around it.
Flashing must shed water in layers
Good flashing uses shingle-style laps. Water coming down the roof should pass over the upstream apron, travel beside the curb on the side flashings, and discharge over the downstream flashing onto the panel field.
A curb can look tightly sealed on a dry day and still leak when wind pushes water uphill beneath a poorly lapped flashing joint.
Underlayment is the secondary drainage plane. It should turn up the curb where the approved detail calls for it, remain continuous at corners, and drain back onto the roof below the opening.
Start with Florida wind, rain, and drainage conditions
Florida storms test rooftop openings from several directions at once. Rain can fall hard enough to overwhelm a shallow diversion path. Wind can drive that water across ribs, under laps, and behind counterflashing.
The project team should identify the roof's design wind pressures, exposure, building height, roof zone, and the hatch location before selecting fastening and flashing methods. Perimeter and corner zones often have different uplift demands than the interior roof field.
Place the hatch where water can leave
Locate the curb away from valleys, drains, scuppers, and known low areas whenever the layout permits. A hatch placed in the direct path of concentrated runoff needs more diversion work than one located on a clear, draining panel field.
The roof surface should retain positive drainage around the curb. On low-slope metal roof areas, a tapered saddle or cricket upslope of the hatch may be part of the engineered drainage plan. Side diverters can also help guide runoff around the opening.
Do not create a dam at the upslope edge. Standing water increases the chance of leakage and can speed coating wear or corrosion.
Plan for wind-driven rain, not only vertical rainfall
Wind-driven rain can enter joints that seem protected by gravity alone. Therefore, the detail may require formed end dams, closure strips, butyl tape, and properly located fasteners to resist water migration.
Butyl tape is commonly used in compressed metal-to-metal laps because it stays pliable across a broad range of service temperatures. Its placement and width must match the approved detail. Surface-applied sealant can support a detail, but it shouldn't replace properly formed overlaps and closures.
Coordinate the hatch curb with the panel profile
The flashing shape depends on the roof panel. PBR and R panels have taller ribs than many AG or Multi-Rib profiles. A 5V panel has its own repeating pattern. Standing seam systems require another level of care because panels expand and contract across long runs.
Provide the panel manufacturer or supplier with the exact profile, material thickness, finish, rib spacing, roof slope, curb dimensions, and hatch location. Calling every ribbed panel "corrugated" leaves too much room for a bad fit.
Exposed-fastener panels need matched closures
On PBR, R, AG, Multi-Rib, and 5V roofs, the curb flashing must account for rib geometry. Foam or molded closures at panel ends can block wind-blown rain and insects, but they must match the profile and sit where the approved detail requires.
Fasteners also need sound attachment points. A screw driven through a flashing leg must engage the specified substrate or framing, use the correct washer where required, and avoid overdriving. An overdriven fastener can dish the metal and compromise the washer seal.
Custom bends are often the practical answer when a stock profile doesn't fit the panel ribs, curb offset, or drainage path. Review the custom metal roof trim ordering guide before submitting a trim request.
Standing seam roofs must remain free to move
Standing seam panels need room for thermal movement. A hatch curb that locks panel pans in place can cause oil canning, open seams, stressed clips, or torn flashing as the roof heats and cools.
For many standing seam systems, the hatch detail uses purpose-made transition components, cleats, clips, closures, and counterflashing instead of face-fastening across panel pans. The correct arrangement varies by panel family. Review the standing seam metal roof panels and obtain the system manufacturer's curb detail before work starts.
Build the flashing sequence around water flow
Metal roof access hatch flashing works best when installers lay out the sequence before cutting panels. Dry-fit the hatch curb and major flashings first. This exposes conflicts with seams, ribs, purlins, roof framing, and equipment clearances before fastener holes appear.
The hatch manufacturer and roofing system manufacturer should both review the proposed transition. Their details may affect curb attachment, minimum clearances, cap flashing, panel termination, and warranty conditions.
Form the upstream and side transitions first
The upslope, or head, flashing needs to direct water away from the curb. Depending on the roof design, it may work with a cricket, diverter, or broad apron that carries water to both sides.
Side flashing should run continuously along the curb walls and maintain a drainage path to the lower roof. Where panel ribs create openings, use profile-matched closures and approved sealant. Keep fasteners out of channels that carry runoff whenever the detail allows.
Corner treatment deserves close attention. Field cuts should fit tightly, have properly lapped folds, and avoid pinholes at vertical turns. A wide smear of sealant over an open corner is a short-term patch, not a durable flashing detail.
Finish at the downslope discharge edge
The lower flashing must overlap the roof panels in the direction of water travel. It should release water onto the panel surface without trapping debris or forcing runoff behind the metal.
Install counterflashing or a cap flashing at the curb-to-flashing transition as the hatch detail requires. This upper piece protects the top edge of the base flashing while allowing the lower metal to drain.
Avoid placing incompatible metals in direct contact. Copper runoff onto steel, unprotected aluminum against certain materials, and mismatched fasteners can trigger galvanic corrosion. Select compatible flashing, fasteners, sealants, and isolation materials for the panel substrate, coating, and local environment.
Fastening and uplift resistance need project-specific review
A hatch creates edges, corners, and flashing legs that can see concentrated wind effects. Fastener selection, spacing, and substrate engagement must come from the approved roof assembly and engineering, not from a generic field habit.
For a retrofit, inspect the existing deck or framing before relying on it for new curb and flashing attachments. Corrosion, thin steel, weakened wood, moisture damage, and inadequate embedment can all reduce withdrawal resistance.
Do not treat every screw as interchangeable
A structural screw that anchors a curb to framing performs a different job than a stitch screw joining flashing laps. Likewise, a wood fastener and a metal-to-metal fastener require different points, threads, and lengths.
Use the fastener type called for in the roof system and hatch details. Confirm the washer material, corrosion protection, penetration depth, and required structural support. In higher wind areas, the project may also call for tested or engineered fastening patterns.
Keep records for inspections and future repairs
Photograph the curb framing, underlayment turns, closure placement, flashing laps, and completed hatch perimeter before access becomes difficult. Keep product data, approval information, shop drawings, fastener records, and any inspection reports with the building's roof file.
That record helps a future contractor distinguish a hatch leak from a failed panel lap, backed-out fastener, or condensation problem. It also reduces the temptation to drill new holes or apply incompatible repair materials.
Inspect hatch flashings after storms and rooftop work
Rooftop HVAC service, antenna work, and foot traffic can damage a hatch transition without obvious interior leakage. Schedule visual checks after major wind events and whenever contractors work near the curb.
Inspect from a safe location first. Look for lifted flashing edges, open laps, displaced closures, loose fasteners, bent counterflashing, coating damage, debris buildup, and stains below the hatch opening. Wet panels and storm conditions call for a qualified roofing professional, not a quick walk across the roof.
Watch for drainage clues
Water that lingers upslope of the curb after normal rainfall may point to a blocked path, a crushed panel, inadequate slope, or a poorly formed diverter. Clear leaves, roof grit, and other debris before they hold water against metal edges.
Also inspect inside the building. Damp insulation, rust streaks, ceiling marks, or a musty odor may reveal water that traveled under panels before appearing indoors.
Repair the source, not the visible symptom
Sealant that has cracked, hardened, or pulled away needs a closer inspection of the flashing arrangement beneath it. Recoating the surface without correcting an open lap or failed closure often sends water farther into the assembly.
When damage affects seams, panel pans, curb structure, or multiple flashing areas, request a qualified assessment. Final repair design and installation should be reviewed by qualified Florida design and roofing professionals.
Final Thoughts on a Dry, Durable Hatch Transition
A roof access hatch is only as reliable as the curb, drainage path, flashings, and fasteners around it. The strongest detail routes water back onto the roof, allows metal panels to move where needed, and resists Florida's wind pressure without relying on exposed sealant alone.
Verify each metal roof access hatch flashing detail against the adopted Florida Building Code, local amendments, hatch manufacturer instructions, metal roofing system requirements, and engineered project documents. Careful coordination before fabrication prevents the costly fixes that begin with a small leak at the curb.
Share Our Metal Roofing News Articles
Related Posts




