How to Seal Metal Siding Cutouts Around Electrical Boxes
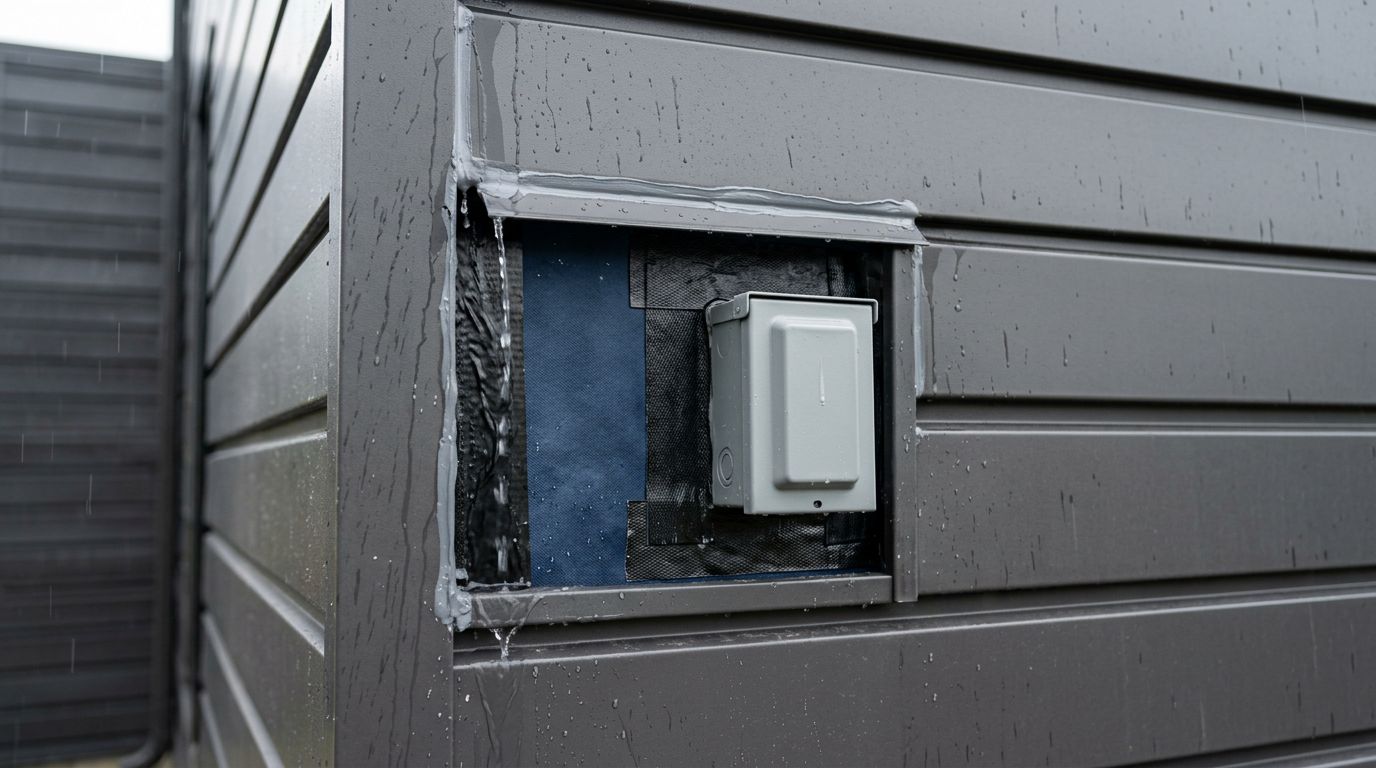
A small gap around an exterior electrical box can let Florida rain reach the wall assembly, even when the metal panel looks tight. To seal metal siding cutouts correctly, use a weatherproof box, integrate flashing with the wall's drainage layer, and apply compatible sealant only where it belongs.
Wind-driven rain can enter at the panel edge, fasteners, trim joints, or the box flange. A durable repair keeps water moving outward instead of trapping it behind the box. Start with electrical safety, then build the opening in layers.
Why Electrical Box Cutouts Need More Than Caulk
Metal siding is the outer part of the wall, not the entire water barrier. Water can pass behind a panel at laps or penetrations, so the box opening needs a planned transition between the siding, flashing, water-resistive barrier (WRB), and enclosure.
Water needs a path to the exterior
The Florida Building Code requires flashing at penetrations and terminations of exterior wall assemblies. The flashing must stop moisture from entering or redirect it to the outside.
That means the upper edge and sides of the box need protection against water flowing down the wall. Review these metal siding flashing and drainage details before cutting into a completed wall. The exact detail depends on the panel profile, WRB, substrate, and box design.
Choose the right exterior box
Use an enclosure listed for exterior exposure, with a gasketed cover and corrosion-resistant hardware. An exterior receptacle usually needs an extra-duty, weatherproof, while-in-use cover where required by the adopted electrical code.
A die-cast aluminum box is common for exterior lighting applications. A quality assembly may include a ground flange, neoprene gasket, and stainless steel cover screws. The box face also needs to finish at the correct plane. When applicable, Florida code limits a box setback to 1/4 inch from a finished noncombustible surface. Follow the box listing and local inspection requirements if an extender or mounting block is needed.
How to Seal Metal Siding Cutouts Safely
Electrical work and box installation require more care than cutting a panel. If wiring must be disconnected, extended, grounded, or moved, hire a licensed electrician.
De-energize and plan the opening
Turn off the circuit breaker before removing a cover, device, or box. Lock or tag the breaker when other workers are present, then test the conductors with a properly rated meter. Never rely on a wall switch as proof that the circuit is safe.
After the circuit is verified dead, identify the framing, box dimensions, panel ribs, trim clearance, and cable entry point. The box should attach to framing or an approved mounting block, not depend on the thin siding panel for support.
Cut the panel cleanly
Measure the opening around the box or mounting flange. Keep the cut no larger than the trim or box design requires. A tight, accurate opening gives the flashing and trim enough material to cover the exposed edge.
Use aviation snips, nibblers, or another tool approved for the panel. Avoid bending the panel face or crushing a rib. Remove sharp burrs, then protect any exposed steel edge with a coating approved for the panel finish. Do not leave bare metal beneath a wet sealant joint.
Mount the box and trim
Fasten the box to its structural support with hardware suited to the substrate and local corrosion conditions. For metal panels, use the fastener type specified for the system, including intact neoprene sealing washers where exposed fasteners are required. Drive screws firmly without crushing the washer or distorting the panel.
Use formed trim or a mounting block to cover the cut edge. Trim should shed water over the panel face, not send it behind the siding. Around ribbed panels, the trim must fit the profile without forcing the metal flat.
Flash the Opening Before You Seal It
Flashing does the main water-shedding work. Sealant supports the detail, but a bead alone cannot replace correctly lapped flashing or a sound WRB connection.
Tie the flashing into the WRB
Do not remove the surrounding WRB simply because the box covers the opening. Cut and fold the barrier according to the wall system's instructions, then connect approved flashing tape or sheet flashing so water moves onto the exterior face.
Place upper layers over lower layers, as you would with other wall penetrations. Flash the top and sides of the box or trim so runoff cannot slip behind the flange. A sill or lower flashing piece may be necessary, but it must direct water outward rather than create a pocket beneath the enclosure.
The goal is a drainage plane that sends water outside, not a sealed cavity that stores water behind the box.
Keep the lower edge able to drain
Avoid sealing the entire bottom edge shut unless the box manufacturer provides a detail that requires it. Many surface-mounted exterior boxes need the lower edge or designated drain openings to remain open so incidental moisture can escape.
Never cover weep holes, drain slots, or the bottom outlet of a trim profile with caulk. Over-sealing can hold water against the sheathing and accelerate corrosion. This is one of the most important details when you seal metal siding cutouts in Florida's wet climate.
Choose Sealant That Bonds to the Panel
Sealant must match the metal, coating, flashing, and weather conditions. Read the product data sheet instead of assuming that any exterior caulk will adhere to painted steel.
Check the approved substrates
Choose a product that lists the actual surfaces in the joint, such as painted steel, galvanized steel, aluminum, sheet metal, and flashing. Titebond WeatherMaster ULTIMATE MP Sealant, for example, lists metal and vinyl siding, flashing, sheet metal, Kynar-coated metals, aluminum, and galvanized steel among its exterior applications.
A neutral-cure silicone is the safer silicone choice for many metal applications. Acid-cure silicone can corrode some metals. If the panel coating is aged, chalky, or slick, clean the surface and follow the sealant maker's instructions for scuffing or primer.
For more product-selection guidance, review this metal roof sealant guide.
Apply the bead to the correct joints
Apply sealant to the joint between the box flange or trim and the metal panel. A product may call for a 1/4-inch to 3/8-inch bead, but the manufacturer's instructions control. Tool the bead so it contacts both surfaces without spreading across the drainage path.
Do not caulk over the box gasket, cover screws, weep holes, or trim openings. Keep sealant off surfaces that must move, drain, or remain serviceable. Remove failed sealant before applying new material, and allow the fresh bead to cure for the stated time before exposing it to heavy rain.
Inspect the Finished Cutout
Before the wall is closed or the circuit is re-energized, check the complete assembly:
- The box is firmly supported and sits at the correct finished-wall depth.
- The cover gasket contacts evenly, and the cover is suitable for exterior use.
- Flashing and WRB layers direct water toward the outside at the top and sides.
- The lower edge and any listed weep openings remain clear.
- Fasteners are snug, their washers are intact, and the panel coating is undamaged.
- The sealant forms a continuous joint without gaps, smears, or trapped water pockets.
After the sealant cures, a gentle hose test from above can reveal gaps. Avoid a pressure washer, which can force water behind the panel. Have the electrician inspect the wiring and restore power only after the enclosure and surrounding wall detail are complete.
Conclusion
A weatherproof electrical box needs more than a bead of caulk around its perimeter. The reliable sequence is to de-energize the circuit, support the box, cut the panel accurately, integrate flashing with the WRB, seal the upper and side joints, and keep the bottom drainage path open.
When you seal metal siding cutouts this way, the panel, trim, enclosure, and wall layers work together. That detail helps keep Florida rain outside without trapping moisture where it can damage the sheathing or fasteners.
Share Our Metal Roofing News Articles
Related Posts