WRB and Tape Details Behind Metal Siding
When metal siding leaks, the problem is often behind the panels, not at the face. Water finds seams, fasteners, window trims, and transitions long before anyone sees a stain inside.
That is why metal siding WRB details matter so much. The barrier, the tape, and the flashing have to work as one system, especially in Florida, where wind-driven rain, heat, and humidity stress every joint. If the layers are out of order, the wall can trap water instead of shedding it.
Key Takeaways
- Continuity matters more than any single product name. The WRB has to stay unbroken behind the siding.
- Shingled laps move water outward. Flat, backwards, or poorly folded joints invite trouble.
- Tape compatibility matters on housewrap, membranes, and sheathing. One tape does not fit every surface.
- Drainage and air sealing work together. A wall needs a path for water and control of air leakage.
- Manufacturer details and local code win every time. Climate zone, wall assembly, and product approvals can change the right answer.
What a WRB Does Behind Metal Siding
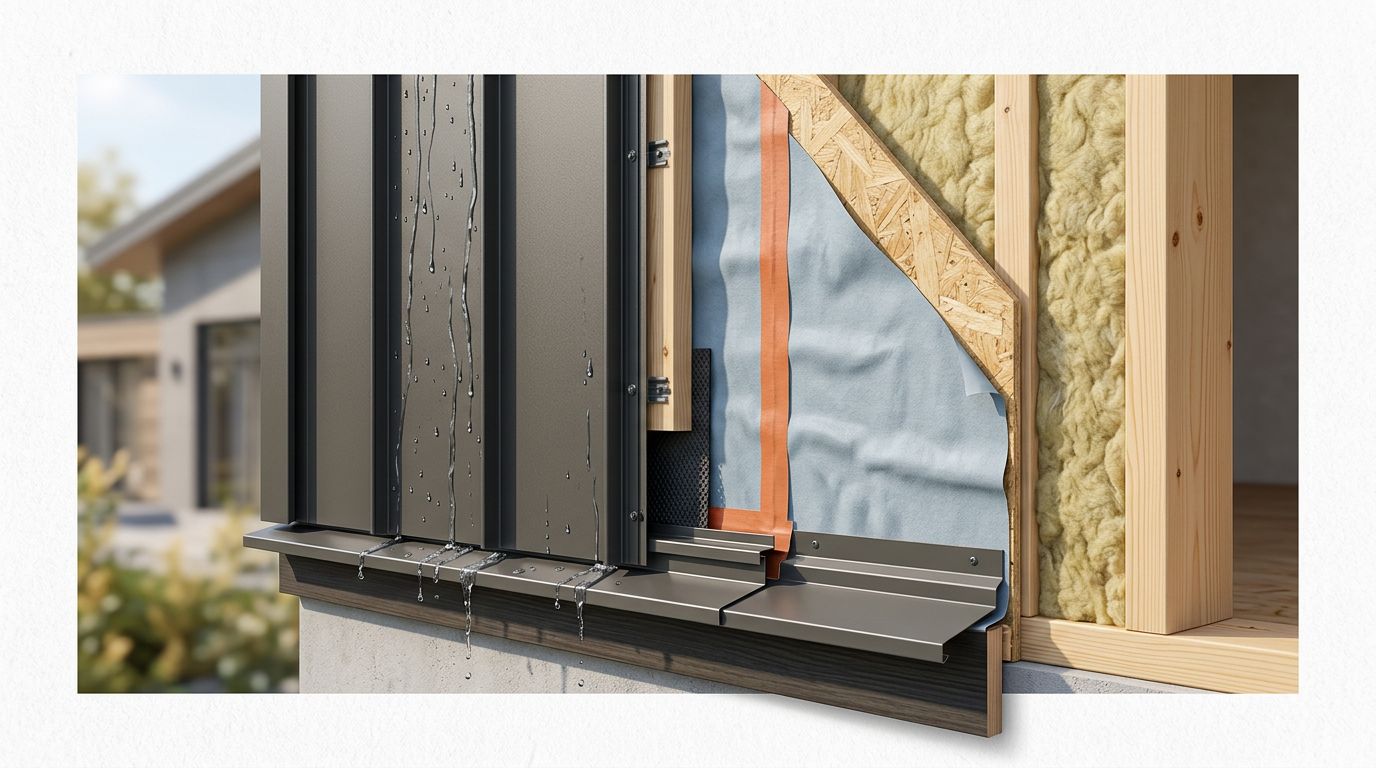
A WRB is the wall's drainage layer. It catches water that gets past the metal and sends it back out before it reaches the sheathing.
In Florida, that matters on almost every exterior. Wind-driven rain can push water through panel laps, screw penetrations, and trim joints, especially during long storms. A metal siding WRB should stay continuous behind the panels, then connect cleanly at the top, bottom, corners, and openings. If the wrap stops short or tears during installation, the wall loses its path for drying.
Different wall systems use different products. Some use a housewrap over plywood or OSB. Others use self-adhered membranes or fluid-applied barriers, especially around openings or in high-exposure areas. The product matters less than the assembly. The wall has to shed water in the same direction at every layer.
That means the WRB should lap over lower materials and under higher ones. Base flashing, starter trim, and trim boots should all fit into that sequence. If the detail forces water uphill, the detail is wrong.
The top edge also matters. It should tie into the roof or upper flashing without a gap, and the bottom edge should dump water onto the exterior face or drainage plane. On tall walls, even small breaks can send water sideways into insulation or framing.
WRB Continuity at Seams, Corners, and Openings
Seams are where many wall systems fail, because the joints look small but carry a lot of water. Horizontal laps should always shed over the lower course. Vertical seams need tape or another approved transition detail that matches the WRB system. Corners need special care, because the wrap has to turn without pulling tight or opening gaps.
Openings demand the same discipline. Around windows and doors, the rough opening needs sill pan flashing, jamb flashing, and a head detail that sends water back to the face of the WRB. The tape should bridge the right layers, not block a path that should stay open for drainage. A clean slit and a folded corner do more than a blob of sealant ever will.
A clean bead of sealant can't fix a reversed lap.
At roof-to-wall intersections, the wall barrier has to meet the flashing in the right order, and sidewall flashing installation guide shows the layering that keeps water moving out. When the wall and roof details disagree, water usually finds the weak side first.
Tight walls also need room to move. Heat, moisture, and wind can shift materials a little over time, so the best details leave the barrier continuous without stretching it across a joint. That small allowance keeps seams from opening later.
Tape That Bonds to the Right Surface
Tape is only useful when it matches the WRB and the substrate. A tape that sticks well to one wrap may fail on another, especially after Florida heat softens the adhesive or after morning moisture settles on the wall. The brand name matters less than the tested pairing.
Here is a quick reference for common conditions:
| Surface or product | Tape use that may fit | What to check |
|---|---|---|
| Polyolefin housewrap | Manufacturer seam tape | Clean, dry surface, correct overlap |
| Self-adhered membrane | Compatible transition tape or patch | Primer needs and temperature limits |
| Fluid-applied barrier | Approved accessory tape or liquid patch | Cure time before covering |
| Plywood or OSB sheathing | Tape approved for the wrap and substrate | Dust, moisture, and rough faces |
Acrylic tapes are common on many housewrap systems because they hold well in heat. Butyl tapes are often used where the detail needs more conformability around corners, pipe boots, or flashing transitions. Both can work well, but only within the system that approves them. If the manufacturer calls for a primer or a roller, use both.
Surface prep is where a lot of good materials fail. Dust, saw residue, wet sheathing, and cold corners all reduce bond strength. Roll every tape joint firmly, then check the edges for lift before the wall gets covered. When two products come from different manufacturers, read the compatibility notes first. A mixed system can work, but only when both makers say it does.
A small test patch saves time on a large wall. If the tape curls, slides, or releases after a short wait, the surface is wrong or the product pairing is wrong. That is easier to fix before the siding goes up.
Drainage and Air Sealing Behind Metal Siding
A wall that can dry usually lasts longer than one that traps moisture. That's why many assemblies use a drainage gap, a vented cavity, or furring strips behind the siding. The gap gives incidental water a path downward, and it gives the wall space to dry after a storm. On exposed Florida walls, that extra drying path can matter.
Air sealing belongs in the same conversation. Gaps around penetrations, seams at sheathing, and untaped transitions let indoor air carry moisture into the wall cavity. That can raise the risk of condensation, even when the outside looks tight. Seal the air barrier where the design calls for it, but keep the drainage path open. Caulk alone should not replace the WRB, and the WRB should not replace a proper air seal.
If the design includes a ventilated rainscreen, keep the openings clear and protected from insects and debris. A drainage space clogged with foam or sealant stops doing its job. Water needs a route out, not a dam behind the siding.
Fasteners need attention too, because every screw or clip makes a hole through the layers. Layout, edge distance, and fastener pattern all affect how much movement the wall allows and how well the assembly holds up. The metal siding fastener placement guide is a helpful companion when the panel schedule gets set, because fastener spacing and panel geometry affect both performance and water control. Once the pattern is fixed, avoid ad hoc screws that pierce flashed areas.
Bottom edges deserve a close look. Water that gets behind siding needs a way to exit at the base, not a place to sit against the sheathing. Starter trim, base flashing, and weep paths should all align with the WRB below. Exact WRB, tape, flashing, and attachment details vary by climate zone, wall assembly, and manufacturer requirements, so the approved detail set should control the job, not guesswork.
Conclusion
The hidden layers behind metal siding do most of the water-management work. When the WRB stays continuous, the tape matches the surface, and the laps shed in one direction, the wall has a clear path to dry.
Florida walls need that discipline because rain, heat, and wind test every seam. A clean installation doesn't depend on one product. It depends on continuity , compatible tape, and flashing that follows the same drainage plan.
A wall package that is thought through before the first panel goes up is easier to build, easier to inspect, and far less likely to trap water. A dry wall starts with layers that agree on where water should go.
Share Our Metal Roofing News Articles
Related Posts