
Metal Siding Flashing Around Overhead Doors
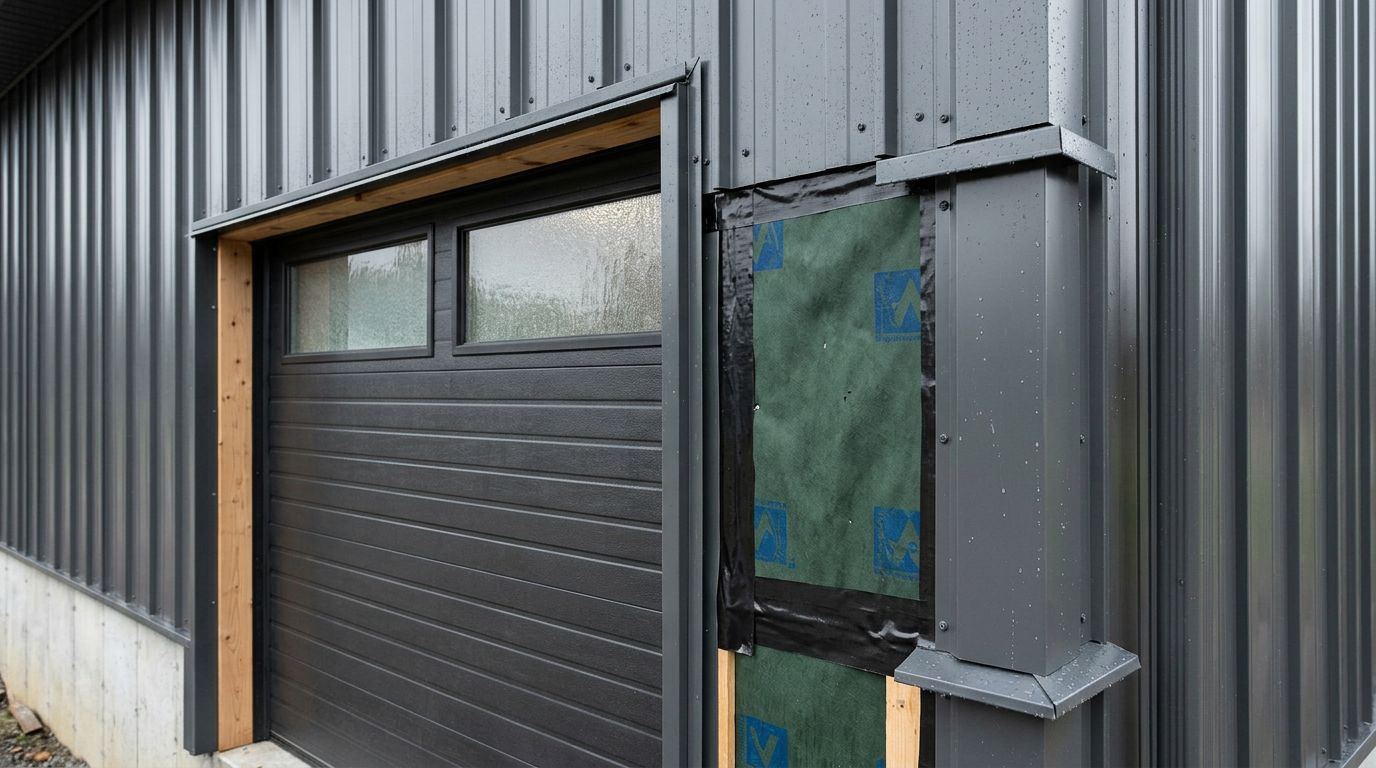
Rain rarely enters through the middle of a metal wall panel. Wind-driven rain finds seams, fastener holes, and trim joints around an overhead door.
Proper metal siding flashing gives water an outward route while protecting the WRB and door seals. Begin with the opening and drainage layers before cutting a panel. A neat trim line matters, but a dry, unobstructed opening matters more.
Gather Materials and Confirm Clearances
Measure the opening in several places. Check its width, height, square, jamb depth, and the space beside each track. The door manufacturer's rough-opening dimensions and required clearances control the installation.
For Florida projects, match the trim to the panel profile and the wall's exposure. Gather the following:
- Wall panels that match the existing siding system
- Profile-specific jamb and head trim
- A compatible water-resistive barrier, or WRB
- Flashing tape, butyl tape, and approved sealant
- Corrosion-resistant screws with sealing washers
- Snips, a drill, a level, a square, and a tape measure
- Cut-resistant gloves, safety glasses, and a stable ladder or platform
Match Trim to the Wall-Panel Profile
AG/Multi-Rib, PBR/R, 5V, and standing seam panels have different rib shapes and dimensions. Confirm the panel profile, rib height, thickness, opening width, and jamb depth before ordering. Mid Florida Metal Roofing Supply provides overhead door and sidewall flashing for common systems, with custom profiles available when a standard bend doesn't fit.
Prepare the Opening for Positive Drainage
Close and secure the overhead door before working. Disconnect power to the opener, and don't remove springs, cables, tracks, or brackets. Never stand beneath a raised door. Keep ladders and tools away from the tracks, rollers, and opener arm.
Integrate the WRB
Inspect the framing for rot, gaps, or movement before installing trim. The wall's WRB should continue around the opening and connect with the surrounding drainage plane.
Cut and fold the WRB according to its installation instructions. Tape the jamb areas first, then install the head layer so it laps over the jamb tape in shingle fashion. The WRB and tape details behind metal siding should guide the exact cuts and laps for your wall assembly.
At the bottom, preserve the planned exit for water. If the opening has a framed sill or raised threshold, use compatible sill flashing and turn it outward. For a slab-level garage opening, keep the trim clear of the floor and bottom door seal. Don't create a deep horizontal pocket that can hold water.
Create an Outward Drainage Path
The head flashing needs a slight outward pitch and a drip edge that carries water past the face of the siding. Its back leg should connect with the WRB, while its outer leg covers the top trim or panel edge according to the wall-panel detail.
Jamb flashing should direct water downward and outward. Leave the lowest drainage point open where the system requires it. Keep tape and sealant away from weep openings and the door track pocket.
A bead of caulk across the bottom of a trim channel can stop the drainage path that protects the wall.
Install Metal Siding Flashing in Sequence
The basic sequence is jamb flashing, head flashing, adjacent panels, then final seals. Follow the panel and overhead-door manufacturer when its detail differs.
Set the Jamb Flashing First
Confirm that each jamb is plumb and that the opening remains square. For most ribbed wall-panel systems, install the jamb trim before the adjacent panels so the cut panel edges fit into the trim channel. If your profile is designed to cover the panel edges, use that arrangement instead.
Fasten the trim only to solid jamb framing. Keep screws out of the door tracks, brackets, weather seals, and other moving parts. Cut the lower ends so water can discharge toward the exterior. Don't force the trim against the side seal or reduce the clearance required for the door.
Cut each panel cleanly with snips or a tool approved for the finish. Remove sharp burrs, and leave the manufacturer's recommended clearance at the opening. A panel that presses against the door frame can buckle as temperatures change.
Install the Head Flashing and Panels
Install the head flashing after the jamb flashing so its ends shed water over the side detail. Keep the drip edge outside the siding plane, and make sure the door's top seal has a clean surface to contact.
Fit the upper panel edges under or behind the head trim as the profile requires. Use closures where the panel shape leaves open ribs, but don't place a closure where it blocks a designed drainage outlet. Fasten panels into the header and jamb framing with the specified screw spacing and pressure. Overdriven washers can deform and leak, while loose screws can allow movement.
Seal trim laps, exposed fasteners, and required joints with compatible tape or sealant. Use enough sealant to close the joint, but don't fill every cavity. Good metal siding flashing depends on layered overlaps, not a thick bead covering a poor fit.
Test the Door and Troubleshoot Leaks
Inspect the work from both sides before the last sealant cures. Look for exposed cut edges, open trim joints, blocked weeps, and screws that sit in the path of a roller or weather seal.
Check Door Operation Before Sealing
Restore power only after all tools and workers are clear. Test the door through its normal travel. If it binds, rubs, or stops against new trim, stop and correct the clearance before operating it again.
The side and top weather seals should contact the intended trim face without riding over screw heads or sharp panel edges. Tracks must remain straight and fully accessible. Never use trim, sealant, or a panel cut to interfere with the track as a substitute for proper door adjustment.
Correct Common Flashing Failures
- Water at the head often points to a reversed lap, missing WRB connection, or head trim that slopes inward.
- Water at one jamb can come from an open corner, an overdriven screw, or a panel edge that doesn't sit fully in the trim.
- Moisture behind the lower siding usually means tape, sealant, or trim has blocked the drainage exit.
- Wavy panels or a rubbing door can indicate tight clearances, out-of-square framing, or fasteners driven too hard.
Don't add more caulk as the first repair. Find the path water is taking, reopen the drainage route, and replace damaged flashing or fasteners when needed.
Conclusion
Flashing an overhead door successfully requires more than covering the panel cut. The WRB, jamb trim, head flashing, panel edges, and door seals must work together while water moves outward and the hardware stays clear.
Measure carefully, match the trim to the panel profile, preserve every drainage opening, and test the door before final sealing. With those steps, metal siding flashing can protect the wall without restricting the overhead door.
Share Our Metal Roofing News Articles
Related Posts




