How Much Should Metal Roof Trim Overlap?
Metal roof trim usually needs 3 to 4 inches of overlap as a starting point, but that number is not the final answer. The right lap depends on the trim profile, roof pitch, exposure, and the manufacturer's installation sheet.
That matters even more in Florida, where wind-driven rain can push water into seams that would hold up in calmer weather. When the product instructions or local code call for a different detail, those rules win every time.
The short answer for most trim joints
For many metal roof trim pieces, a 3 to 4 inch overlap is a practical rule of thumb. It gives you enough coverage for water shed without creating a bulky joint that looks awkward or fights the panel layout.
Still, treat that number as a starting point, not a universal standard. Some trims need more lap, some need a specific direction, and some need sealant tape or closure material at the joint.
Water should always move over the lap, not into it.
Here's a quick reference for common trim situations:
| Trim situation | Common starting point | Why it changes |
|---|---|---|
| Eave or drip edge | 3 to 4 inches | Must send water into the gutter or off the edge cleanly |
| Endwall or headwall flashing | 3 to 4 inches, shingle style | Needs strong water control where roof meets wall |
| Sidewall or rake trim | 3 to 4 inches | Exposure, slope, and appearance affect the joint |
| Special transition pieces | Follow the system detail | Shape and fastening matter more than a fixed number |
The takeaway is simple. Use the overlap the system calls for, then work within that range only if the detail allows it. If you are ordering new pieces, planning trim overlaps and laps before you cut helps avoid short runs and waste.
Why trim type changes the lap
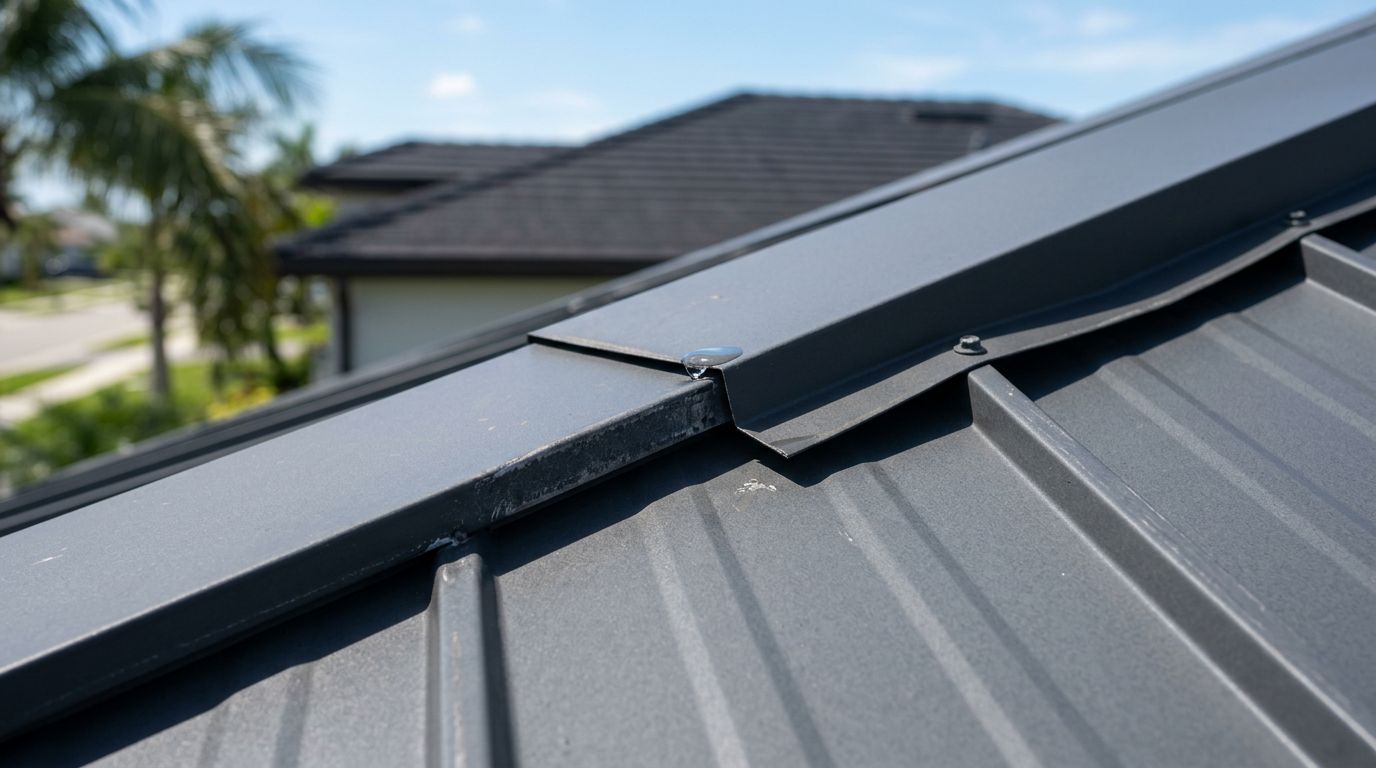
Not every trim piece behaves the same way. A drip edge, for example, mainly moves water away from the roof edge. An endwall flashing has a harder job because it has to keep water out where the roof meets a vertical wall.
For eaves, the lap should support clean drainage into the gutter or away from the fascia. A short overlap can leave a capillary path, especially if the joint opens a little under heat. For that reason, metal roof eave trim laps need careful fit, not just enough metal to cover the seam.
Roof-to-wall details need even more care. The upper piece should overlap the lower piece in a shingle-style path so water stays on the outside of the assembly. In that setting, Florida roof-to-wall flashing details matter because the wall, underlayment, and trim all work together.
Long runs can also change the answer. A trim joint that looks fine on a short eave may open or shift on a long exposed wall. Thermal movement, wind, and slight framing differences can all affect the seam. So can the panel profile itself. A flat trim edge and a ribbed trim edge do not lap the same way.
Standing seam systems are a good example. Their trim accessories often depend on exact clips, closures, or factory details. In those cases, a generic overlap number is not enough. The profile controls the joint, not the other way around.
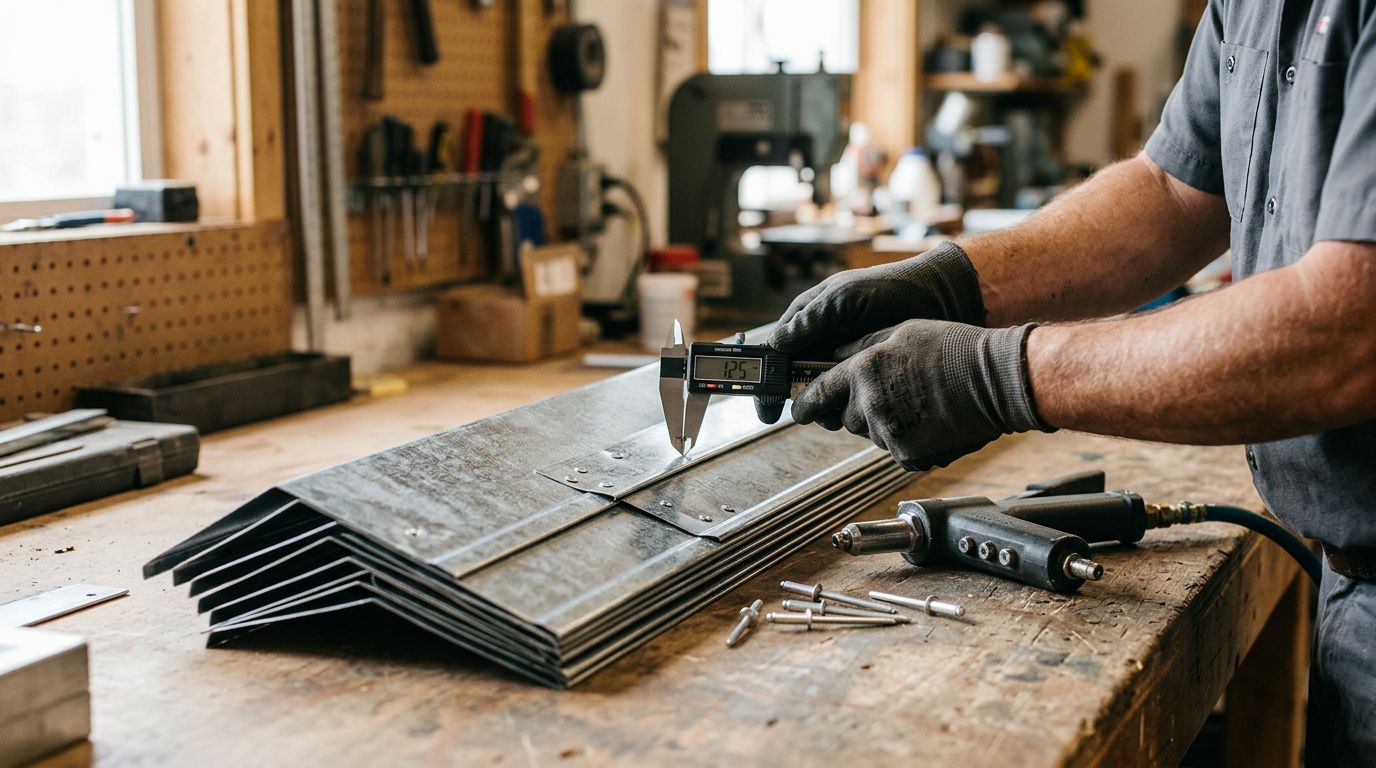
How to measure the overlap the right way
Bad measurements are one of the fastest ways to create a leaky seam. The trick is to measure the finished condition, not just the raw length of the metal.
Start by dry-fitting the pieces. Then mark the lap line where the second piece will cover the first. Measure from the visible edge to that mark, because that is the real working length.
A simple field check helps:
- Dry-fit both pieces in place.
- Mark the overlap line before you cut.
- Check that the lap sheds water in the right direction.
- Confirm the joint lines up with the panel, wall, or gutter below.
- Recheck the measurement after bending or hemming, because the finished size can shift.
Fastening matters just as much as the lap length. Put fasteners where the manufacturer shows them, often near the ends or just outside the main overlap zone. Do not overdrive the screws. A crushed flange can hold the joint in place and still open a path for water.
If you are having trim made, include the lap in the order notes. A trim piece that is the right total length but wrong at the overlap still causes trouble. Ordering custom metal roof trim with the overlap plan written out is usually the cleaner move.
When sealant tape helps, and when it does not
Sealant tape, often butyl tape, is useful when the detail calls for extra water control at the lap. It works best when the surfaces are clean, the overlap is tight, and the fasteners are placed correctly.
It should support the joint, not replace the joint. A lap that depends only on caulk is a weak detail. In Florida sun and heat, exposed sealant can age faster than the metal around it.
Use sealant tape where the system requires it or where the detail is exposed to wind-driven rain. That includes some wall flashings, end laps, and tricky transitions. However, do not add tape just because it feels safer. Extra material can interfere with fit if the trim profile needs to slide or nest in a specific way.
The best approach is simple. Dry-fit first, tape second, fasten third. That sequence helps the overlap seat properly and keeps the seal where it belongs.
Florida weather raises the bar
Florida roofs see hard rain, strong sun, and gusty wind. Those conditions punish weak laps. A joint that survives in a mild climate may fail here when rain is blown sideways under the trim.
That is why the safe answer is not just "3 inches" or "4 inches." The better answer is, "use the approved overlap for that trim, then favor the tighter, better-protected detail when the roof is exposed." On windward edges, at roof-to-wall transitions, and near wide overhangs, the lap has to do real work.
Local code matters too. So do product approvals and the manufacturer's printed instructions. If a trim sheet says one thing and a generic rule says another, follow the sheet. That keeps the roof consistent with the tested system, which is the part that matters most.
Conclusion
For most metal roof trim, 3 to 4 inches is the right place to start, but it is not a one-size-fits-all rule. The trim type, the roof detail, and the weather exposure all change the answer.
Measure the finished lap, fasten it where the system calls for it, and use sealant tape only when the detail needs it. In Florida, that careful approach matters more than a quick rule of thumb.
Share Our Metal Roofing News Articles
Related Posts