How to Flash a Gooseneck Vent on a Metal Roof
A gooseneck vent is small, but the leak risk around it is not. Metal roofs move, shed water fast, and punish weak details, so the flashing around any roof opening has to be tight and well planned.
If you want the vent to stay dry, you need more than sealant and good intentions. The gooseneck vent flashing has to match the panel profile, the pitch, and the roof system details, or water will find the weak spot sooner or later.
Start with the roof, not the vent
Before you cut anything, look at the roof as a water path. The vent location should work with the panel layout, not against it.
A good layout keeps the opening out of obvious trouble spots. Avoid valleys, major runoff paths, and awkward panel transitions when you can. If the vent must sit in a busy water line, the flashing detail needs extra care.
Check these points first:
- Panel profile : standing seam, ribbed, or exposed-fastener panels all need different trim shapes.
- Roof pitch : low slopes hold water longer, so laps and seal lines matter more.
- Vent size and shape : the opening should match the base and hood without forcing the trim.
- Underlayment condition : the secondary water layer should stay intact around the cut.
When the vent behaves more like a roof opening than a simple pipe penetration, metal roof curb installation best practices give a good reference point for keeping laps and runoff in order.
Gather the right materials before you cut
The right parts make the job cleaner and more reliable. The wrong parts make every later step harder.
Use flashing that matches the roof system and the vent body. On many metal roofs, that means a formed base, compatible closures, and a hood or gooseneck top that ties in cleanly. If the stock trim does not fit the panel profile, custom-bent flashing is often the better choice.
Have these items ready before installation:
- matching flashing or base trim
- compatible fasteners for the roof system
- butyl tape or approved sealing tape
- a sealant approved for the metal and finish
- touch-up paint for cut edges, if needed
- snips, drill, measuring tools, and a marker
Use materials that play well together. Mixed metals can corrode over time, and cheap sealant can fail after a few hot Florida summers. Fasteners should match the roof system and should not be overdriven. A crushed washer or bent flange is a future leak.
If the flashing does not shed water in layers, it is the wrong detail.
How to flash the gooseneck vent step by step
The exact order changes by panel type and flashing style, but the basic sequence stays the same. Work slowly, measure twice, and keep every layer pointed downhill.
- Lay out the opening carefully
Mark the vent location from the inside and confirm it lines up with the outside panel pattern. A clean layout matters because a crooked cut can force the flashing to sit unevenly. - Cut the roof opening
Cut only what you need for the vent body and its base. Keep the cut clean, and remove all metal shavings right away. Shavings left on the roof can stain panels and damage coatings. - Protect the underlayment
Patch the underlayment around the opening so water still has a backup path if wind drives rain under the trim. The patch should lap in the same direction as the rest of the roof system. - Dry-fit the flashing first
Set the flashing or base in place before adding sealant. Make sure it sits flat, follows the panel ribs correctly, and leaves room for movement. If it rocks or bridges over ribs, it needs a better fit. - Install closures and seal lines
Use profile-matched closures where the detail calls for them. Apply butyl tape or approved sealant where the flashing will compress against the roof surface. Keep the sealant in a continuous line, but do not smear it everywhere. - Fasten in the right locations
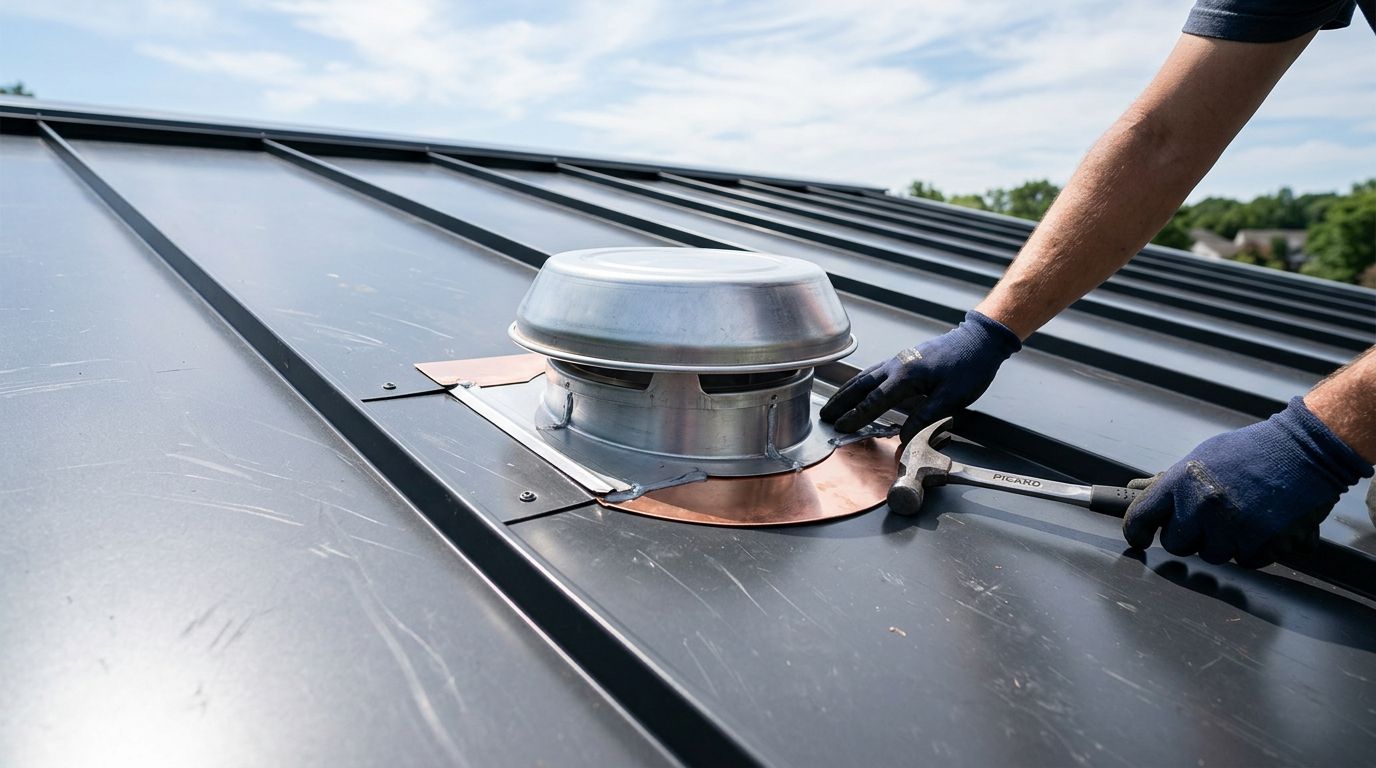
Place fasteners where the trim is designed to take them, usually in the flange or designated fastening zone. Avoid fasteners in water paths unless the system detail calls for them. Tighten them enough to seat the washer, then stop. - Set the gooseneck vent body or hood
Attach the vent component so it overlaps the base flashing in the correct direction. Upper pieces should lap over lower pieces, the same way shingles shed water. That overlap is the heart of the detail. - Seal exposed edges and inspect the joints
Finish exposed seams with a thin, even bead of compatible sealant. Wipe away excess material, then check every fastener, lap, and edge. The vent should look neat, but it should also read like a water path that always points down and out.
A little patience here saves a lot of repair work later. If a piece does not sit right, stop and re-fit it before the roof gets closed up.
What changes on different metal roof panels
A gooseneck vent on a standing seam roof is not treated the same way as one on an exposed-fastener roof. The panel profile changes how the base sits, how it fastens, and how much sealant the detail needs.
| Roof condition | What changes | Why it matters |
|---|---|---|
| Standing seam panels | Fastening points and trim shape | You may need custom pieces, not face screws through seams |
| Exposed-fastener panels | Screw pattern and washer placement | Overdriving can crush washers and invite leaks |
| Low-slope roof | More attention to laps and sealant lines | Water moves slower and sits longer |
| Steep pitch | More runoff at the vent | Upper laps must shed water cleanly |
| Ribbed panel profile | Closure shape and base fit | A poor match leaves gaps under the flashing |
The takeaway is simple. The vent detail has to follow the roof system, not fight it. A perfect-looking bead of caulk cannot fix a flashing that sits wrong.
Common mistakes that lead to leaks
Most vent leaks start with one small shortcut. A good roof detail avoids those shortcuts before they turn into stains on the ceiling.
Watch for these problems:
- Relying on sealant alone : Sealant helps, but it should not carry the whole job.
- Forcing a bad fit : If the flashing does not match the panel, water will find the gaps.
- Fastening through the wrong area : Screws in the wrong spot can create direct leak points.
- Skipping cleanup : Metal shavings, dust, and old sealant scraps can ruin the finish.
- Ignoring movement : Metal expands and contracts, so the flashing needs room to move without tearing the seal.
- Mixing incompatible materials : Different metals and wrong fasteners can shorten the life of the detail.
Small mistakes matter more on metal roofs because the roof moves and sheds water quickly. A detail that works on paper can still fail if the pieces are rushed in the field.
When the job needs a custom detail or a roofer
Some gooseneck vents are straightforward. Others sit near ridges, transitions, or tight roof geometry that makes a standard part hard to use.
Call for help if the vent lands near a wall, valley, ridge, or major roof change. Those areas often need a custom trim piece, a better drainage path, or a different fastening plan. The same applies if the roof is steep, the panel is damaged, or the underlayment is already compromised.
Florida roofs also deserve a close look after hurricanes, heavy wind, or long sun exposure. A trim piece that looked fine years ago may no longer seal the way it should. If the vent detail has already failed once, replacing the damaged parts is usually smarter than trying to patch over old problems.
Conclusion
A solid gooseneck vent flashing job comes down to three things: fit, lap direction, and compatible materials. If the flashing matches the roof profile and sheds water in the right order, the vent has a much better chance of staying dry.
The roof type matters just as much as the vent itself. Panel profile, pitch, fastener layout, and manufacturer requirements all shape the final detail, so the same step-by-step approach does not fit every roof.
When in doubt, slow down and treat the opening like a water channel, not a hole in the roof. That mindset keeps the detail clean, and it keeps leaks from starting in the first place.
Share Our Metal Roofing News Articles
Related Posts