How To Cut Metal Roofing Panels Without Damaging The Finish
You've got fresh metal roofing panels ready for your Florida home or job site. One wrong cut, though, and the painted finish scratches or the coating melts. That leads to rust spots fast in our humid air.
Cutting metal roofing demands the right tools and care. Heat from bad blades ruins coatings. Burrs and filings embed in panels, causing corrosion later. Homeowners and contractors alike waste time and money on fixes.
This guide shows you safe methods. You'll learn tools that work, steps to follow, and tips to keep edges protected. Let's get those panels cut clean.
Why Finish Damage Hurts Your Metal Roof Long-Term
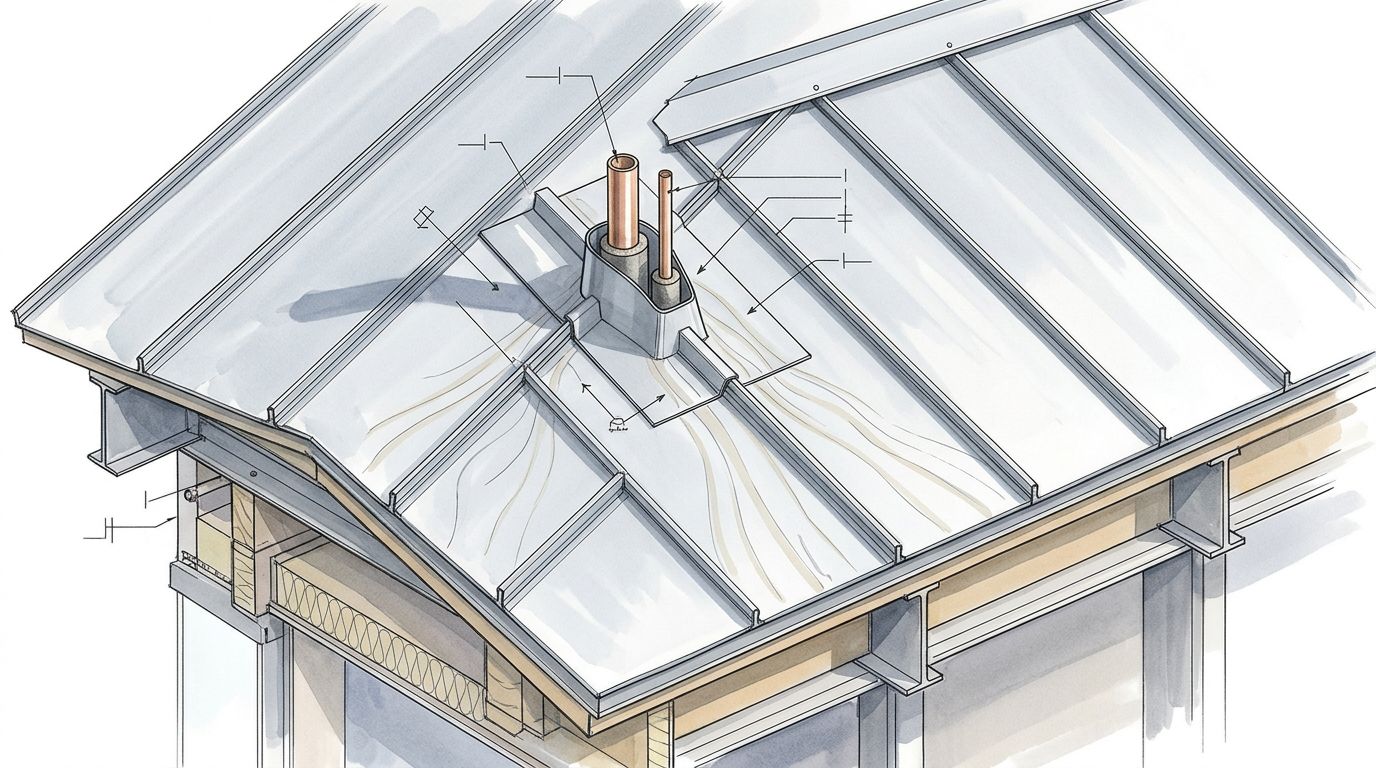
Panels arrive with tough coatings like Kynar or Galvalume. These protect against Florida's sun, salt air, and storms. A damaged finish exposes bare metal. Rust starts within months.
Heat is the big enemy. Abrasive tools melt coatings along cut lines. Filings from rough cuts stick to wet panels after rain. They rust and stain everything below.
Burrs create sharp edges too. They snag during install and tear neighboring panels. Poor cuts shorten roof life from 50 years to half that. Always prioritize clean, cool cuts.
In short, treat every cut like it shows on the finished roof. That mindset saves headaches.
Pick the Right Tools to Avoid Heat and Burrs
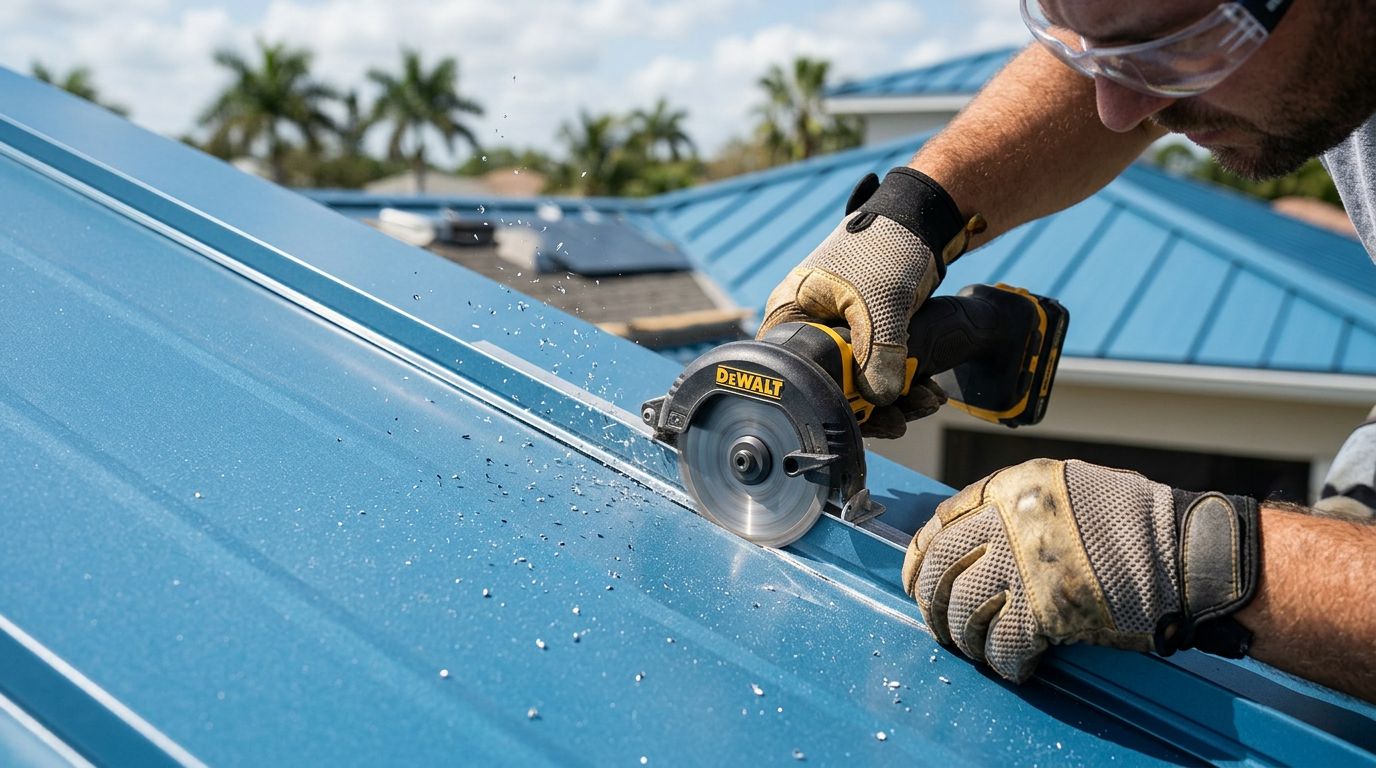
Choose shears over grinders. They snip metal without friction. No heat buildup means the coating stays intact.
Aviation snips handle straight or slight curves best. They're cheap and portable for small jobs. But they tire your hands on long cuts. Use red for right curves, green for left.
Electric shears speed things up. They power through panels with minimal burrs. Models like Makita nibblers punch clean holes too. Battery-powered ones work anywhere on site.
Mechanical shears offer precision for pros. They're quiet and leave smooth edges. Avoid angle grinders completely. They throw sparks, heat metal, and grind off coatings.
Here's a quick comparison:
| Tool | Best For | Pros | Cons |
|---|---|---|---|
| Aviation Snips | Short straight cuts | Affordable, no power needed | Hand fatigue on long runs |
| Electric Shears | Long straight lines | Fast, low burrs | Needs battery/charging |
| Nibblers | Curves and holes | Clean edges, versatile | Slower on straights |
| Angle Grinder | Avoid entirely | None for coated panels | Melts coating, sparks |
For full details on best tools for field cutting metal panels, check our guide. Stock up on quality ones before starting.
Step-by-Step Process for Safe Panel Cuts
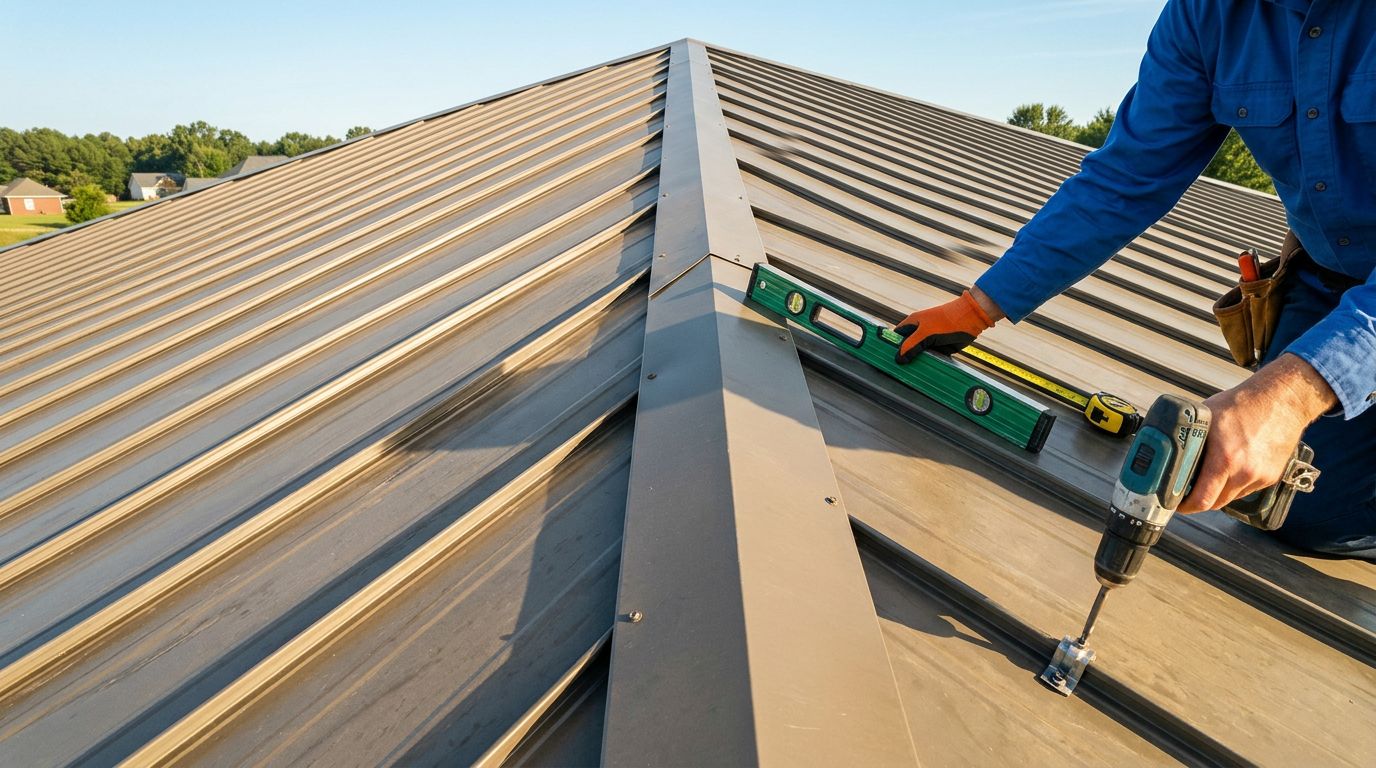
Mark your cut line on the panel's underside. Paint shows scratches less there. Use a straightedge and fine-tip marker. Measure twice.
Secure the panel on sawhorses. Clamp it down flat. Work on the ground, never on the roof. Debris falls away clean.
Start with snips for short runs. Open the handles wide for leverage. Cut slowly in one direction. Support the panel to prevent wobbling.
For long cuts, switch to electric shears. Align the blade and guide along your line. Let the tool do the work. Pause to clear chips.
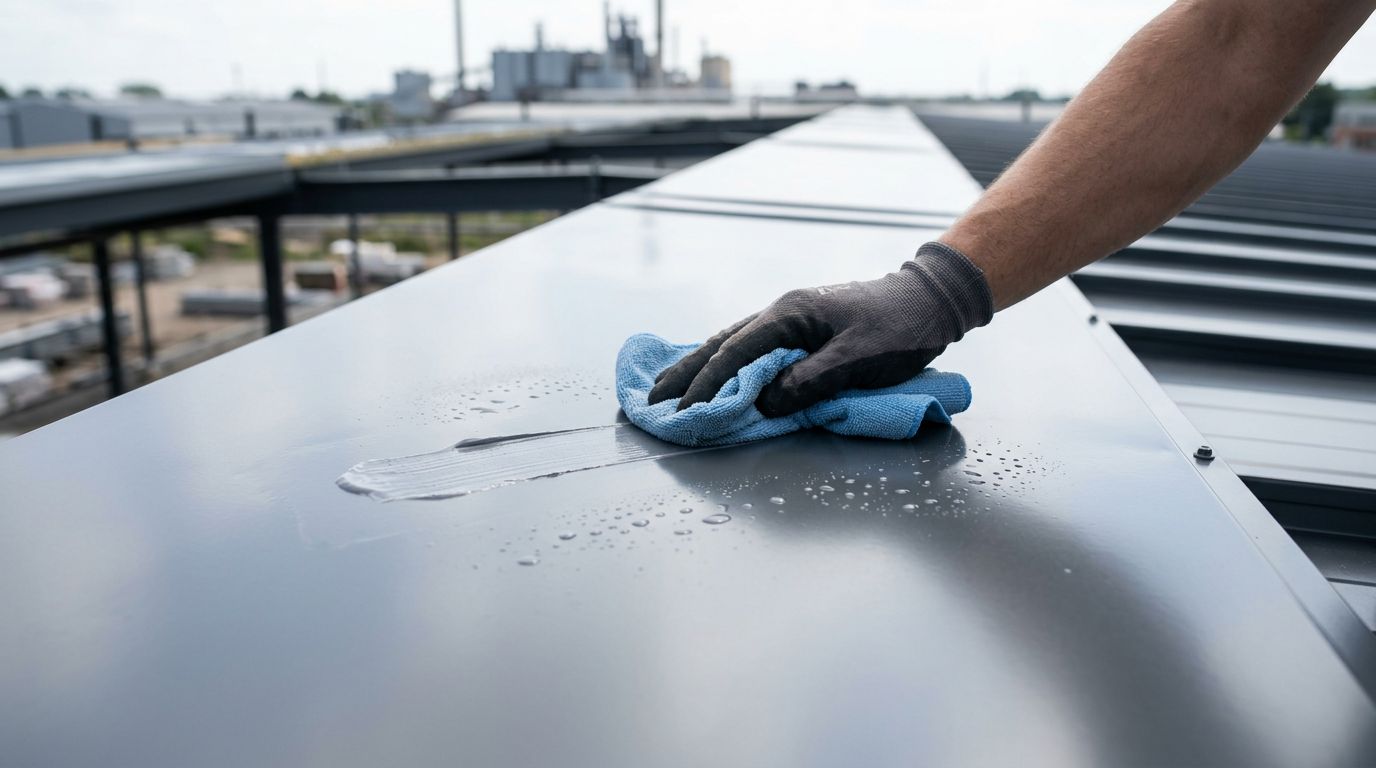
After cutting, deburr edges with a file. Smooth them without scratching the coating. Wipe with a clean rag.
Test fit the piece right away. Adjust if needed before stacking. Always cut extras for mistakes.
Follow these steps, and your 5V crimp metal panels or others stay pristine.
Seal Cut Edges to Stop Corrosion in Florida Humidity
Fresh cuts expose raw metal. Florida's moisture turns them rusty quick. Prime those edges right after cutting.
Brush on a zinc-rich primer. It mimics Galvalume protection. Let it dry fully before install. Touch up any scratches too.
For standing seam or PBR metal roof panels, apply sealant at laps. Butyl tape works best. It flexes with panel movement.
Paint over primer with matching color if visible. Acrylic paint bonds well to metal. Avoid oil-based; it traps moisture.
Store panels off the ground after cutting. Cover loosely to block rain. First-in, first-out keeps edges fresh.
These habits extend edge life by years. No more surprise rust after the first storm.
Clean Up Shavings to Prevent Stains and Pits
Metal filings act like nails on a chalkboard for finishes. They embed and rust under rain. Brush them off immediately.
Use a soft broom or vacuum after every cut. Work downhill so debris doesn't redeposit. Rinse panels with water if dusty.
On the roof, cover lower panels with tarps. Catch shavings before they land. Magnetic sweepers grab steel bits fast.
Inspect daily. Tiny spots grow into pits. Early wipe-downs keep warranties valid.
Common Mistakes Homeowners and Contractors Make
Rushing without marking leads to wavy lines. Always double-check.
Cutting on the roof sprays filings everywhere. Stay on solid ground.
Overlooking primer voids protection. Rust creeps in silently.
Using dull blades heats metal. Sharpen or replace often.
Skipping cleanup dooms the job. One storm reveals stains.
Learn from these. Your roof thanks you.
Quick FAQ on Cutting Metal Roofing Panels
Should you use an angle grinder?
No. It generates too much heat and sparks. Coatings melt, and edges corrode fast.
How do you prevent rust on cut edges?
Prime with zinc-rich paint right away. Seal laps with butyl tape. Store panels dry.
What's the best way to clean metal shavings?
Broom or vacuum immediately. Use magnets for steel bits. Rinse panels and cover lower ones.
Wrap Up with Confidence
Clean cuts protect your investment. Use shears, prime edges, and clean thoroughly. Your Florida metal roof lasts decades rust-free.
Grab panels like our standing seam roof panels today. Need advice? Call us for quotes. What's your next roofing project?
Share Our Metal Roofing News Articles
Related Posts