
Standing Seam Roof Anchors Without Panel Damage
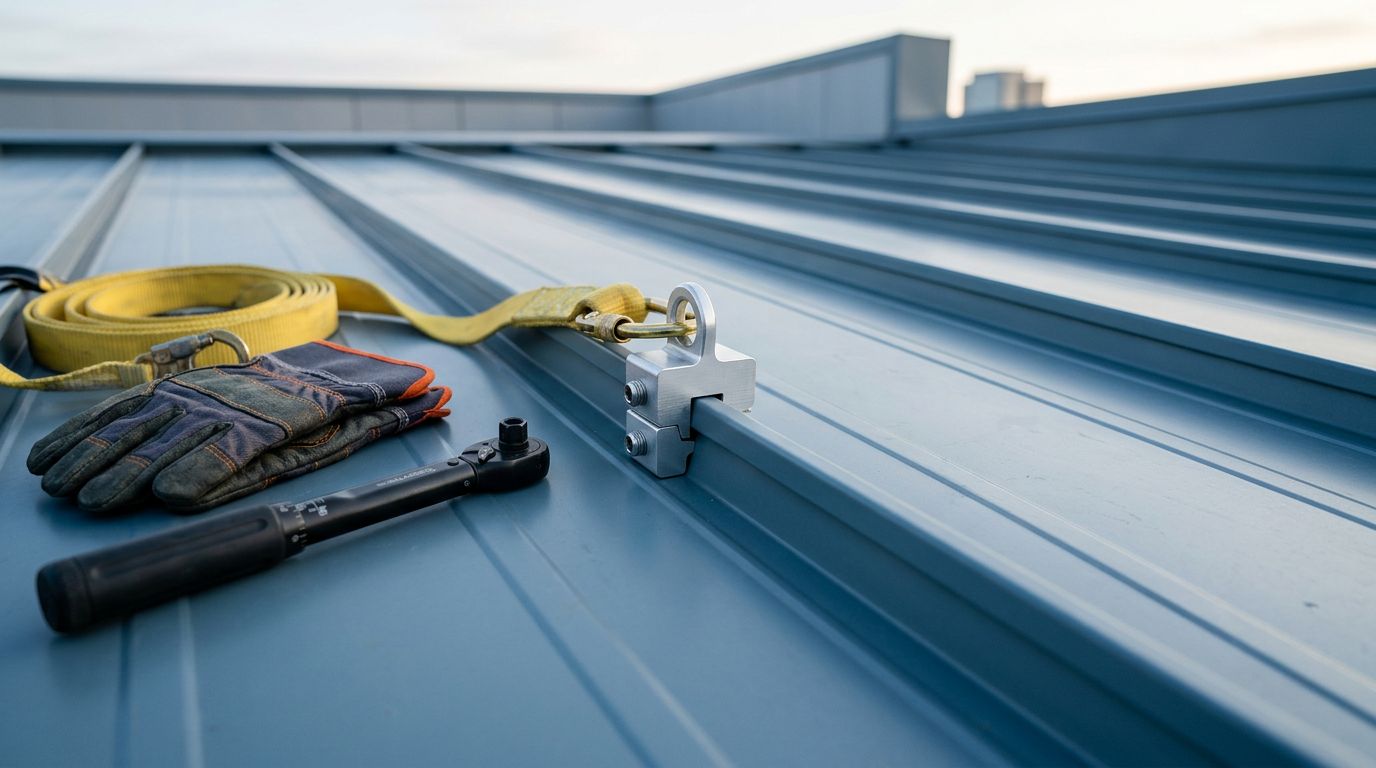
A roof anchor can protect a worker, but the wrong attachment can crush a seam, scratch the finish, or create a leak. Standing seam panels need careful handling because their concealed fasteners and interlocking ribs carry both weather and structural loads.
The safest choice matches the anchor to the exact panel profile, seam construction, metal thickness, and approved installation details. Before anyone climbs, confirm the roof manufacturer's requirements, the anchor manufacturer's data, and a qualified professional's engineering guidance.
Key Takeaways
- No standing seam roof anchor fits every panel. Snap-lock and mechanically seamed roofs can require different attachment methods.
- Seam-clamp anchors can avoid panel penetrations, but only when the clamp is approved for the specific seam.
- Penetrating anchors need a verified structural connection to framing or another designed load path.
- Correct torque, clean tools, and careful placement help prevent dents, coating damage, and corrosion.
- Fall-protection systems must follow applicable regulations, manufacturer instructions, and qualified professional guidance.
Start With the Roof and Panel Profile
Standing seam roofing is a system, not a single universal panel design. Profiles differ in seam height, seam width, locking method, steel thickness, clip design, and attachment pattern. Those differences determine whether a clamp can grip the seam without deforming it.
A snap-lock seam may have an interlocking shape that a clamp could crush if the clamp jaws are too narrow or apply force in the wrong place. A mechanically seamed panel may have a different rib shape and a different load capacity. The same anchor can perform correctly on one profile and slip or damage another.
Begin by identifying the exact panel system. Check the project documents, panel order, installation manual, or manufacturer's label. If the roof has been installed for years, measure the seam only after confirming the measurement method with the anchor manufacturer. A small profile difference can affect compatibility.
Mid Florida Metal Roofing Supply provides information for its standing seam metal roof panels, including installation resources and related project components. Use the panel documentation as a starting point, then compare it with the proposed anchor's approved compatibility list.
The roof's condition matters too. Corrosion, loose seams, oil-canning, damaged coatings, and previous repairs can affect anchor placement. An anchor should never hide a roof defect or compensate for a weak panel. A qualified roofing or structural professional should inspect the area before approving a tie-off point.
A panel's ability to shed water doesn't automatically make it suitable for carrying fall-arrest forces.
Choose a Clamp That Matches the Seam
Seam-clamp anchors are often considered first because they can attach without drilling through the panel. Instead of creating a hole, the device grips the vertical seam with engineered jaws and fasteners. That approach can protect the weather barrier, but it only works when the clamp matches the seam design.
Review the anchor manufacturer's published requirements for:
- Panel brand or profile and seam type
- Seam height, width, and geometry
- Minimum and maximum panel thickness
- Approved metal types and finishes
- Required clamp spacing or anchor configuration
- Rated loads for fall arrest, restraint, or work positioning
- Compatible lifelines, lanyards, and connectors
- Required inspection and torque procedures
These details matter because a clamp is part of a complete fall-protection system. A device rated for travel restraint may not be approved for personal fall arrest. A single-point anchor may have different requirements than a horizontal lifeline. The connector, lifeline, harness, and anchor must work together under the system's design.
Don't assume that a stainless steel clamp works on every steel roof. Material compatibility affects corrosion, while the clamp shape controls grip. Avoid mixing components from different manufacturers unless the system instructions allow that combination.
A low-cost clamp without traceable load data is a poor choice for a life-safety application. Ask for the product instructions, test information, compatibility chart, and inspection criteria before purchasing. If the manufacturer cannot identify the approved panel profiles, select another system or obtain an engineered detail.
Know When a Penetrating Anchor Is Necessary
Some roofs require a penetrating anchor because the seam alone cannot provide the needed connection. Penetrating systems attach through the panel and into a rafter, purlin, structural deck, or other supporting member. They can provide a reliable load path, but only when the underlying structure and flashing detail are designed for that force.
A screw placed into the panel alone is not a structural anchor. It can also create a leak and leave the surrounding metal vulnerable to distortion. The anchor location must connect to the specified framing member, with fasteners, washers, sealants, and flashing installed according to the approved detail.
Before selecting this option, verify the framing layout. On agricultural and commercial buildings, purlin spacing and orientation can vary. On residential roofs, rafters may not align with the proposed location. A contractor may need access to the underside of the roof or building drawings to confirm the connection.
Penetrations also affect the roof warranty. The roofing manufacturer, anchor manufacturer, and installer should agree on the detail before work begins. Use only the fasteners and sealants specified for the panel and anchor system. A general-purpose screw or sealant may not have the required corrosion resistance, temperature range, or weathering performance.
You can review compatible metal roofing fasteners and accessories, but product selection still depends on the approved roof and anchor detail. Hardware for ordinary panel installation isn't automatically suitable for a fall-protection attachment.
Install Without Crushing or Scratching Panels
Correct installation protects both the roof and the worker. Even a compatible anchor can cause damage when a crew places it incorrectly, overtightens the fasteners, or drags tools across the finish.
Keep the following practices in place during installation:
- Inspect the seam first. Remove dirt, metal chips, sealant residue, and loose coating from the contact area. Don't install over a dent, cut, open seam, or damaged finish.
- Position the clamp exactly as instructed. Keep the jaws fully seated on the approved seam surfaces. Don't force a clamp over a rib that doesn't fit its profile.
- Use the specified fasteners. Substituting bolts, screws, washers, or shims can change the clamp's performance and damage the panel.
- Tighten to the manufacturer's torque. Use the specified sequence and a suitable torque wrench. Over-tightening can flatten or distort the seam, while under-tightening can reduce grip.
- Keep tools and debris off the finish. Metal filings from drilling or grinding can rust on the panel surface. Remove debris with methods approved for the coating, rather than rubbing sharp particles across the paint.
- Protect the roof during access. Use approved walk paths, clean footwear, and manufacturer-approved roof protection. Don't drag ladders, toolboxes, or anchor assemblies across the panels.
- Check the completed connection. Look for seam deformation, coating scratches, displaced sealant, loose hardware, and contact between incompatible metals.
Don't add rubber strips, tape, homemade spacers, or extra sealant unless the product instructions approve them. These materials can change the clamp's grip or prevent the hardware from seating correctly.
The anchor is also not a step, handhold, ladder support, or lifting point unless its instructions expressly identify that use. Keep workers connected through the approved system, and never allow a lanyard or lifeline to rub against a sharp panel edge.
Account for Florida Weather and Roof Conditions
Florida roofs face intense sun, heavy rain, high humidity, salt air near the coast, and strong wind events. Those conditions make material compatibility and roof condition especially important.
Coastal projects may need hardware selected for a more corrosive environment. Galvanized steel, stainless steel, aluminum, panel coatings, and treated lumber can interact differently when moisture remains at a connection. The anchor manufacturer should identify compatible materials and any restrictions for coastal exposure.
Heat also changes working conditions. A metal roof can become uncomfortable and slippery under direct sun, while sudden rain can make the surface unsafe. Schedule work around weather conditions, follow the fall-protection plan, and stop when the roof no longer provides safe footing. Lightning is an immediate reason to leave an exposed roof.
Wind loads deserve separate attention. An anchor's fall-arrest rating doesn't automatically approve it for permanent building tie-down, suspended loads, hoisting, or other uses. Likewise, a roof panel's Florida approval applies to the roofing system covered by that approval, not necessarily to an added anchor or lifeline.
For workplace projects, the employer must identify and follow applicable OSHA fall-protection rules. Depending on the work and industry, requirements may include construction rules under 29 CFR Part 1926, Subpart M, or general-industry provisions. A qualified safety professional should also determine whether ANSI/ASSP requirements, site rules, or an engineered plan apply.
Homeowners should avoid treating a roof anchor as a do-it-yourself accessory. Fall-arrest forces can injure a person and damage the roof if the system is poorly selected. Have a qualified roofing contractor, safety professional, or structural engineer review the complete setup.
Inspect the System Before and After Use
Inspection starts before installation. Check the panels, seams, clips, framing, fasteners, sealants, and proposed anchor location. Look for corrosion, loose hardware, coating failure, bent seams, water stains, and previous penetrations. If any condition raises doubt, pause the installation until a qualified professional evaluates it.
After installation, compare the completed anchor with the manufacturer's instructions. Confirm that the clamp sits squarely, the seam remains intact, and the fasteners have the required torque. On penetrating systems, inspect flashing and sealant without assuming that a bead of sealant proves the connection is watertight.
Workers should inspect the fall-protection system before each use and after any event that could affect it. A fall, dropped load, severe weather event, impact, or unauthorized modification can require removal from service. Follow the anchor manufacturer's inspection schedule and replacement criteria.
Roof maintenance can also affect an anchor. Recoating, pressure washing, replacing panels, installing solar equipment, and repairing flashing may require the anchor to be removed or relocated. Never leave a clamp in place while another crew changes the seam beneath it.
Keep records for commercial work, including the anchor model, compatible panel profile, installation date, installer, inspection results, and any repairs. Good documentation helps the next contractor avoid guessing about a life-safety connection.
Conclusion
Choosing standing seam roof anchors without damaging panels starts with the exact roof profile and a verified load path. Seam clamps can protect the weather barrier, but only when their geometry, materials, ratings, and torque requirements match the panel.
Penetrating anchors need engineered structural support and approved flashing details. Every fall-protection system must follow the roof manufacturer's requirements, anchor instructions, applicable regulations, and qualified professional guidance. The safest anchor is the one that protects the worker without asking the roof panel to perform a job it wasn't designed to do.
Share Our Metal Roofing News Articles
Related Posts




