
Fix a Creased Metal Roof Panel Before Installation
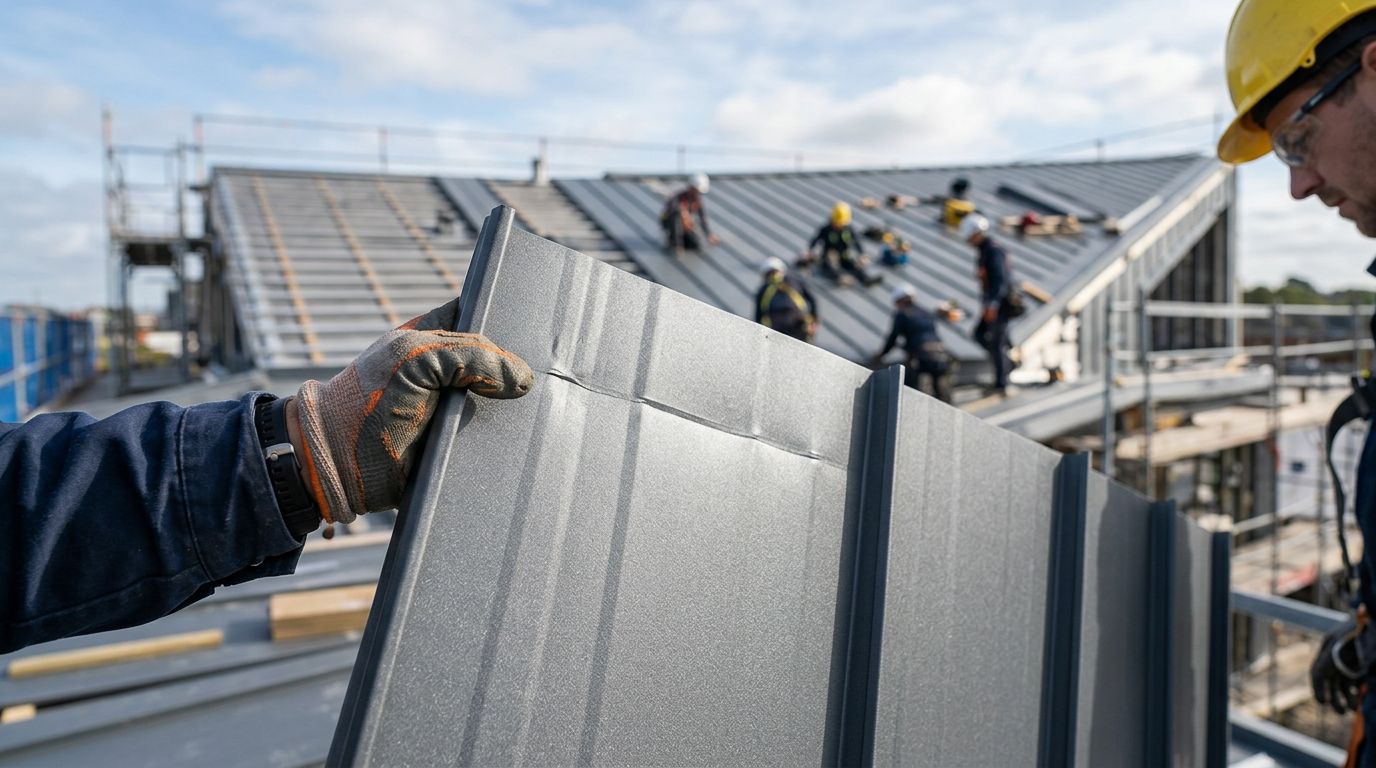
A creased metal roof panel can look minor on the ground but create leaks, poor alignment, or visible ripples after installation. Before you try to straighten it, inspect the finish, ribs, seams, and fastener areas.
You may be able to fix a shallow cosmetic crease in the flat part of a panel. A sharp fold, cracked coating, distorted rib, or damaged locking edge usually calls for replacement. Use the panel manufacturer's installation guidance as the final authority, especially for Florida projects that require approved roofing systems.
Key Takeaways
- Inspect both sides of the panel before attempting a repair.
- Minor creases in a flat, undamaged area may respond to gentle pressure.
- Never force a panel back into shape if its ribs, seams, holes, or coating are damaged.
- Wear cut-resistant gloves, eye protection, long sleeves, and sturdy footwear.
- Replace panels that could affect water drainage, alignment, wind performance, or the finished appearance.
Inspect the Panel Before You Reach for Tools
Start by moving the panel to a clean, level work surface. Do not inspect it on gravel, concrete debris, or the edge of a truck bed. Those surfaces can scratch the finish or add another bend while you handle the panel.
Wear cut-resistant gloves and eye protection . Long sleeves and sturdy work shoes also help protect you from sharp sheet-metal edges. Ask another person to help with long panels, because flexing a panel during handling can enlarge the crease.
Look at the damaged area from both sides. A crease may appear as a shallow line on the painted face but show a sharper fold underneath. Use a straightedge, such as a clean level or straight board, to compare the affected area with the surrounding metal. Check whether the panel still lies flat and whether its ribs remain evenly spaced.
Inspect the coating as well. A paint line, flaking finish, exposed metal, or white stress mark can indicate that the metal or coating has stretched. A scratch may be repairable with an approved touch-up product, but a cracked or broken coating deserves more caution. Do not cover the damage with paint before deciding whether the panel needs replacement.
Measure the crease and note its location. A short mark in the middle of a flat panel has a different risk than a bend that runs through a rib, lap, eave edge, or standing seam. Take clear photographs before making changes. They can help the supplier or installer identify whether the panel remains usable.
A crease in a flat area may be cosmetic. A crease that changes the panel's profile is a functional concern.
Decide Whether the Crease Is Repairable
The safest candidate for repair is a shallow crease in the flat field of the panel. The surrounding metal should remain smooth, the paint should remain intact, and the panel's profile should still match an undamaged piece. Even then, the repair may leave a faint line that remains visible in certain light.
A creased panel becomes much less suitable for repair when the metal has folded sharply. Steel and aluminum can stretch, buckle, or harden along a fold. Once that happens, pressing the panel flat may move the distortion into another area instead of removing it.
Replacement is usually the better choice when the damage affects:
- A major rib or raised corrugation
- A standing seam lock, clip area, or male or female seam leg
- An end lap, side lap, eave edge, ridge edge, or rake edge
- A pre-punched or planned fastener hole
- A cut edge, hem, or factory-formed flashing section
- The panel's ability to drain water in the correct direction
Replace the panel if you find a tear, puncture, elongated hole, cracked coating, exposed metal, or visible oil-canning that extends well beyond the original crease. A distorted panel can prevent proper screw seating and may leave gaps around closures or trim.
Standing seam panels require extra care because their interlocking geometry must remain precise. A small change in the seam leg can prevent the panels from locking together. Ribbed panels also need their profiles to align at side laps. Do not assume a panel is acceptable because the damaged area will sit near a screw.
If the panel carries a product approval or warranty, follow its repair and replacement requirements. Florida roofing systems often depend on the complete panel, fastening pattern, trim, and installation method. When the correct decision isn't clear, send photographs and panel information to the supplier before cutting or installing it.
How to Straighten a Minor Crease Safely
Before you fix a creased metal roof panel, read the manufacturer's handling and installation instructions. Some finishes and panel systems have specific restrictions on field repairs. The following method applies only to a minor crease in an otherwise sound panel.
- Prepare a padded work surface. Place clean plywood or padded supports across sturdy sawhorses. Keep the panel fully supported near the damaged area. Do not balance it on a single rib or let a long end hang unsupported.
- Clean away grit. Brush off sand, metal filings, and dirt with a soft cloth. Grit trapped between the panel and a wood block can scratch the finish as you apply pressure.
- Protect the painted face. Place a clean piece of plywood, dense foam, or smooth wood between your hand or tool and the panel. Cover any wood that could leave marks. Avoid bare metal tools against the finished surface.
- Apply broad, gradual pressure. Start beside the crease instead of pressing directly on its sharpest point. Work toward the center with your hands or a wide, flat wood block. Broad contact spreads the force and reduces the chance of creating a new dent.
- Support the opposite side. If the crease forms a raised ridge, support the surrounding flat area and press against the high spot from the other side. For a shallow inward dent, support the panel around the depression and apply controlled pressure from underneath. Stop often and check the shape rather than forcing one large movement.
- Avoid sharp impacts. Don't use a steel hammer, pry bar, locking pliers, or a narrow punch. These tools can stretch the metal, chip the coating, and leave a repair mark that is more severe than the original crease. Use a rubber mallet only if the manufacturer's instructions permit it, and strike a broad wood block with light taps.
- Never heat the panel. A torch, heat gun, or other heat source can damage the paint system, alter the metal, and create a visible color difference. Heat also adds an unnecessary fire risk around roofing materials and packaging.
- Recheck the profile. Lay a straightedge across the panel and compare the repaired area with an undamaged section. Test the side lap or seam connection against a matching panel without forcing the pieces together. If the edges no longer align, stop and replace the panel.
The goal is to reduce a shallow deformation, not to make a folded panel look new. Metal that has stretched along a crease may retain a line even after careful pressure. Never hide a failed repair under trim, sealant, or paint.
If the repair leaves exposed metal, ask the panel manufacturer which touch-up coating is approved for that finish. Use only a compatible product and follow its surface preparation instructions. Touch-up paint cannot restore lost strength or correct a distorted seam.
Know When Replacing the Panel Is the Right Fix
A replacement panel costs less than correcting a leak after the roof is closed in. It also prevents wasted labor if the damaged piece causes alignment problems several rows later.
Replace the panel when it no longer matches the original shape, length, or seam dimensions. A panel that rocks on a flat surface, has a twisted end, or creates a gap at the lap has structural or installation concerns, even if the crease looks small.
Visible damage also matters on exposed roof areas. Sunlight can highlight a crease after installation, especially on dark colors and broad flat sections. If the project has a clean architectural finish, replacement is often the only reliable way to achieve a uniform appearance.
Do not cut out a damaged section and splice in a new piece unless the panel system specifically allows that repair. Most roof panels are designed to shed water as continuous pieces. An improvised splice can create an unapproved joint and interfere with the required lap, sealant, or fastening pattern.
When ordering a replacement, match the panel profile, metal type, thickness, finish, color, length, and any factory-formed details. A panel that looks similar may not lock correctly with the existing system. Keep the original damaged panel until the replacement arrives so you can compare dimensions and features.
Prevent Creases During Storage and Handling
Careful handling starts when the panels arrive. Inspect bundles for crushed corners, punctures, wet packaging, and signs of shifting before moving them to the job site. Photograph damage immediately and keep the panels available for inspection.
Carry long panels with enough support to prevent them from flexing sharply. Follow the manufacturer's instructions for lifting and bundle support. Never drag panels across one another, because sliding can scratch the coating and catch an edge.
Store panels off the ground on clean, level supports. Keep them protected from traffic, falling tools, and contact with masonry or untreated lumber that can stain the finish. If panels are covered, allow air circulation to reduce trapped moisture and condensation.
Plan the staging area before installation begins. A clear path, adequate support, and two-person handling prevent the sudden bends that cause many field creases. Keep fasteners, trim, and tools away from stacked panels until each piece is ready to install.
Conclusion
You can sometimes fix a creased metal roof panel when the damage is shallow, limited to a flat area, and free of coating or profile damage. Work slowly on a padded surface, use broad pressure, and protect your hands from sharp edges.
A sharp fold, damaged seam, distorted rib, cracked finish, or misaligned lap deserves replacement. The best repair is the one that leaves the panel safe to install, properly aligned, and able to perform as the manufacturer intended.
Share Our Metal Roofing News Articles
Related Posts




